
Introduction: Why Insulation Matters More Than Ever
Home insulation might not be the most glamorous upgrade, but it is one of the most impactful improvements any homeowner can make. Whether you’re aiming to cut energy bills, boost comfort, or reduce your carbon footprint, upgrading your insulation pays dividends year-round. Yet, many homeowners underestimate the complexity and cost of insulation projects, especially when it comes to different areas of the home, local permit requirements, and long-term maintenance. Choosing the wrong material, neglecting regulatory steps, or failing to maintain your insulation can quickly erase potential savings. In this comprehensive guide, we’ll break down the true costs of insulation by area and material, highlight when and where permits are required, and provide a structured approach for maintaining your investment over time. If you’re considering upgrading attic, wall, crawlspace, or basement insulation, this article will equip you with the knowledge you need to avoid common pitfalls and maximize value.
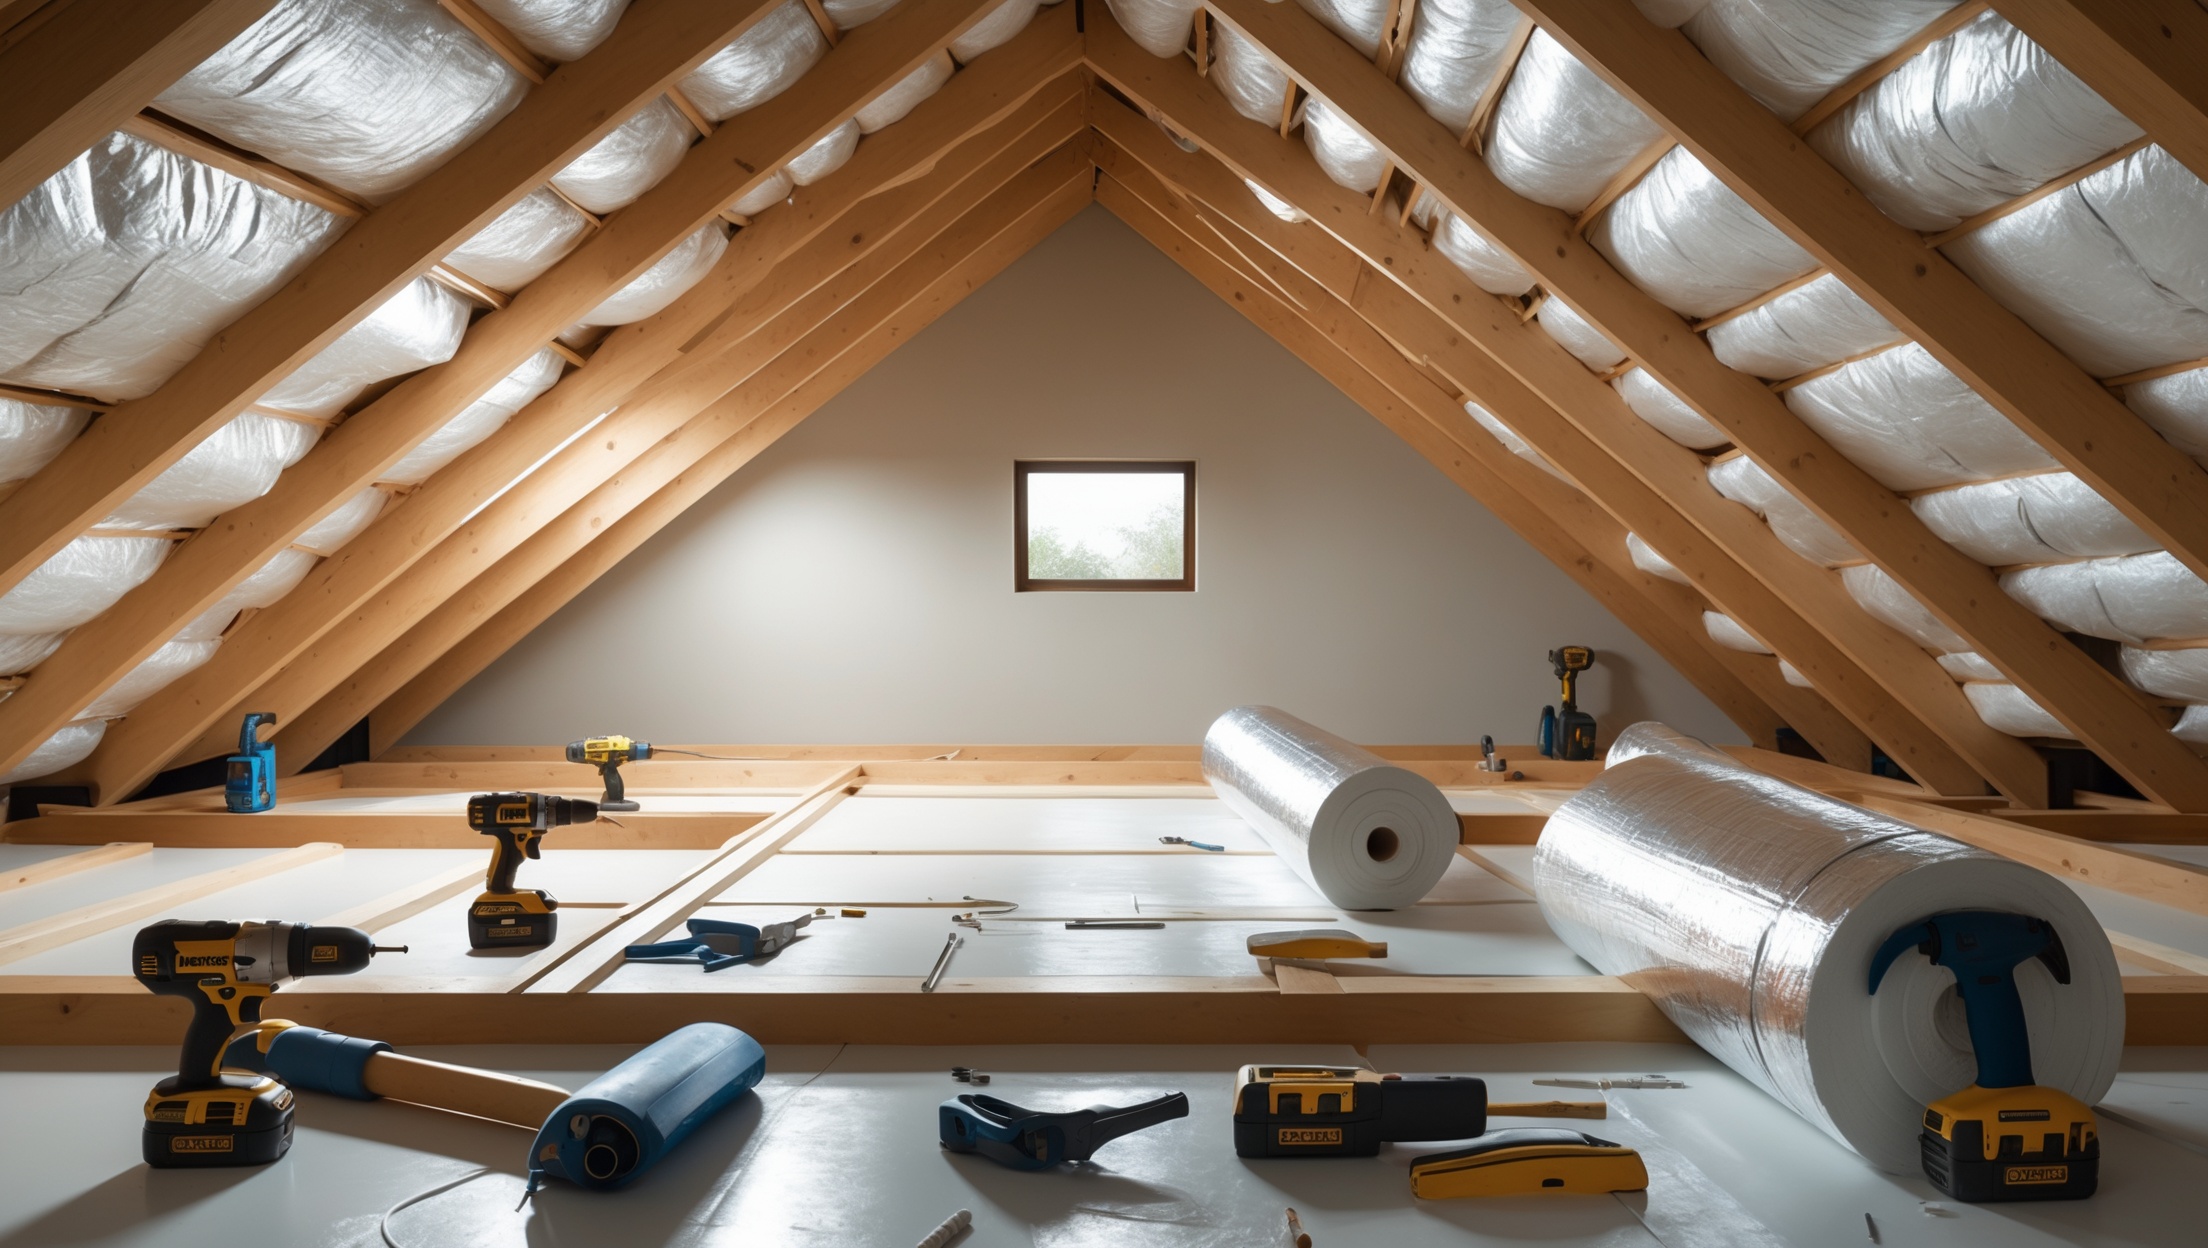
Insulation Options: Types, Performance, and Suitability
Choosing the right insulation is critical for effectiveness and cost-efficiency. Here’s a concise overview of the most common types:
- Fiberglass Batts and Rolls: Affordable, easy to install, best for attics and walls. R-Value: R-3.0 to R-3.8 per inch.
- Blown-In Cellulose: Made from recycled paper, good for attics and wall cavities. R-Value: R-3.2 to R-3.8 per inch.
- Spray Foam: Expands to fill gaps, excellent air sealing, best for irregular spaces. R-Value: R-6.0 to R-7.0 per inch.
- Rigid Foam Boards: Used in basements, exterior walls, and crawlspaces. R-Value: R-4.0 to R-6.5 per inch.
- Mineral Wool: Fire-resistant, good soundproofing, suitable for attics and walls. R-Value: R-3.0 to R-3.3 per inch.
Your choice will depend on budget, climate, and the area of your home being insulated.
Cost Breakdown: Materials, Labor, and Hidden Expenses
Insulation costs vary widely based on the area covered, material chosen, and whether you hire a professional or go DIY. Below, we break down typical costs for the most common insulation projects.
Attic Insulation
- Fiberglass Batts: $1.00–$1.50 per square foot installed
- Blown-In Cellulose: $1.20–$1.80 per square foot installed
- Spray Foam: $2.50–$3.50 per square foot installed
For a 1,000 sq. ft. attic, expect to spend $1,000–$3,500 depending on material and labor.
Wall Insulation (Retrofit)
- Blown-In Cellulose: $1.75–$3.00 per square foot (requires small holes drilled in walls)
- Spray Foam: $3.00–$5.00 per square foot
Cost is higher due to labor and wall repair after installation.
Basement & Crawlspace Insulation
- Rigid Foam: $2.00–$3.50 per square foot installed
- Spray Foam: $3.50–$5.00 per square foot installed
Basement insulation often requires vapor barriers and additional prep, adding $500–$1,500 to the project.
DIY vs. Professional Installation
- DIY Materials Only: Save 30–50% on labor, but risk lower quality or code issues.
- Professional Install: Warranty, code compliance, higher upfront cost.
Hidden and Ongoing Costs
- Permit Fees: $50–$300 depending on municipality.
- Disposal of Old Insulation: $200–$500 if professional removal is needed (especially with asbestos or rodent damage).
- Air Sealing Upgrades: $250–$1,000 for caulking, weatherstripping, and sealing penetrations (highly recommended for effectiveness).
- Post-Installation Repairs: Drywall patching or painting, $200–$600 depending on scope.
Permit and Compliance: What Homeowners Need to Know
Insulation projects often fall under local building codes, especially if they alter fire barriers, vapor barriers, or involve spray foam. Here’s how to stay compliant:
When Is a Permit Required?
- Attic Insulation: Typically required if you add or replace significant insulation, especially with spray foam.
- Wall Insulation: Permit often needed if you cut into drywall or siding.
- Basement & Crawlspace: Usually requires inspection for vapor barriers and fire safety.
How to Obtain a Permit
- Contact your local building department; requirements vary by city and county.
- Prepare a description of work, material data sheets, and location plans.
- Pay the permit fee and schedule inspections as required (pre- and post-installation).
- Some municipalities require licensed contractors for spray foam or basement insulation.
Common Code Requirements
- Minimum R-Values: Vary by climate zone—check local codes or energy.gov for guidance.
- Fire Barriers: Spray foam must often be covered by drywall or a thermal barrier.
- Vapor Barriers: Required in basements and crawlspaces to prevent moisture issues.
Inspection Tips
- Take photos before, during, and after installation for documentation.
- Keep receipts and datasheets for all materials.
- Schedule inspections promptly to prevent project delays.
Preparing for Your Insulation Upgrade
A successful insulation upgrade starts with a detailed plan. Here’s how to prepare:
1. Evaluate Current Insulation
- Measure the depth and coverage of existing insulation (use a ruler in attic spaces).
- Look for gaps, damage, or signs of pests, leaks, or mold.
- Check for drafts or cold spots inside the home.
2. Identify Target Areas
- Focus on attics, exterior walls, basements, and crawlspaces.
- Use a thermal camera or infrared thermometer to locate heat loss points (available for rent at hardware stores).
3. Choose the Right Material
- Consider climate: Colder climates benefit from higher R-values, while hot climates need radiant barriers or reflective insulation.
- Factor in fire safety, moisture resistance, and soundproofing needs.
4. Budget and Schedule
- Get at least three quotes for professional installation.
- Account for permit fees, materials, labor, and contingency (10–15%).
- Schedule during dry, mild weather for best results (avoid rainy or humid periods).
Step-by-Step Insulation Upgrade Process
While approaches differ by area and material, here’s a structured process for most home insulation projects:
1. Clear and Prepare the Area
- Remove stored items, debris, and any old or damaged insulation (wear protective gear).
- Seal air leaks around pipes, vents, and wiring with caulk or spray foam.
- Install vapor barriers where required, especially in basements and crawlspaces.
2. Install New Insulation
- Fiberglass Batts: Fit snugly between joists—avoid compressing material.
- Blown-In Cellulose: Use a blower machine (often available for free with material purchase).
- Spray Foam: Best left to professionals due to chemical handling and expansion control.
- Rigid Foam: Cut to fit, seal seams with tape or spray foam.
3. Ensure Code Compliance
- Install fire and vapor barriers as required by local codes.
- Do not block soffit vents in attics—maintain airflow to prevent moisture buildup.
4. Post-Installation Steps
- Restore storage or flooring as needed.
- Patch and paint any wall openings for wall insulation retrofits.
- Schedule final inspection if permits were required.
Maintenance Best Practices for Home Insulation
Insulation is not a set-it-and-forget-it upgrade. Proper maintenance preserves comfort and prolongs the benefits.
Routine Inspection Checklist
- Check attics, basements, and crawlspaces at least once per year—preferably before winter and summer peaks.
- Look for water stains, mold, or mildew (signs of roof or plumbing leaks).
- Watch for evidence of pests (rodents, insects) which can damage insulation.
- Verify that insulation remains dry, fluffy (if batt or loose-fill), and evenly distributed.
Addressing Common Issues
- Moisture: Fix leaks promptly and replace any wet insulation. Mold must be remediated by professionals.
- Settling or Compression: Add new layers as needed to maintain recommended R-value.
- Pest Damage: Identify and seal entry points, replace contaminated material.
- Drafts or Cold Spots: Check for missed air leaks, insufficient coverage, or gaps around penetrations.
Long-Term Strategies
- Re-inspect after any home renovation, roof repair, or flood event.
- Upgrade insulation every 15–20 years, or sooner if material degrades.
- Keep attic ventilation unobstructed to avoid moisture buildup.
Maximizing ROI: Energy Savings and Added Comfort
While insulation upgrades require upfront investment, the long-term savings are substantial. Here’s what to expect:
- Reduced Heating and Cooling Costs: Save 10–30% annually on energy bills in most climates.
- Improved Comfort: Fewer drafts, more consistent temperatures, quieter indoor environment.
- Increased Home Value: Upgraded insulation is a major selling point for buyers.
- Rebates and Incentives: Many utilities and governments offer rebates (check DSIRE for programs in your area).
Conclusion: Insulation Upgrades as a Smart Homeowner Investment
Upgrading your home’s insulation is one of the most effective steps you can take to enhance comfort, save money, and future-proof your property. While the process involves careful planning, budgeting, and attention to local codes, the long-term rewards far outweigh the initial effort. By understanding the true costs, selecting the right materials, securing necessary permits, and committing to ongoing maintenance, you’ll protect your home against rising energy costs and unpredictable weather. Remember to document your project, prioritize air sealing, and take advantage of rebates or incentives where available. Insulation is not just about keeping heat in or out—it’s about creating a healthier, quieter, and more resilient living space for years to come. Whether you’re tackling a DIY attic project or hiring professionals for a whole-home upgrade, use the strategies in this guide to avoid costly mistakes and maximize your return. The comfort and savings you gain will make every step worthwhile.
I’m planning to upgrade the insulation in my attic but I’m not sure how to figure out if a permit is actually required in my city. Are there tips or typical signs that a permit might be needed for DIY jobs, especially for attic or wall projects?
Permit requirements can vary by city, but attic and wall insulation upgrades often need a permit if they significantly alter the structure, fire safety, or energy efficiency of your home. Signs you might need one include removing walls, modifying electrical work, or accessing shared spaces. It’s a good idea to call your local building department and describe your project—they can quickly let you know if a permit is required for your specific plans.
Could you clarify what kinds of permits are usually required for insulating a commercial property, especially for interior wall and attic upgrades? I want to avoid any common regulatory missteps before starting my project.
For insulating a commercial property, you’ll typically need a building permit, especially for interior wall and attic insulation upgrades. Local regulations often require you to submit plans showing insulation types and fire ratings. Fire safety and compliance with energy codes are key concerns. Check with your city’s building department to confirm exact requirements, as some areas may also require inspections or special permits if you’re altering fire barriers or electrical systems during the upgrade.
I noticed that spray foam insulation offers much higher R-values compared to fiberglass or cellulose, but is it really worth the extra upfront cost in terms of energy savings over the years? Also, are there maintenance concerns unique to spray foam I should consider?
Spray foam insulation does have higher R-values, which generally means better energy efficiency and greater savings on heating and cooling costs over time. However, whether it’s worth the extra upfront cost depends on factors like your climate, home size, and how well your house is sealed overall. For maintenance, spray foam can be more difficult to repair if you need to access wiring or plumbing later, and improper installation may cause issues like moisture buildup. Weigh your long-term goals and budget before deciding.
If I go with spray foam because of its higher R-value, are there any specific maintenance issues I should watch out for that are different from fiberglass or cellulose? The article mentions maintenance but doesn’t go into much detail for each type.
With spray foam insulation, you should watch for any signs of moisture issues or gaps developing over time. Spray foam can trap moisture if there are roof leaks or high humidity, leading to mold or wood rot behind the insulation. Also, inspect for pests, as rodents can sometimes tunnel through foam. Unlike fiberglass or cellulose, spray foam is hard to repair if disturbed, so try to avoid cutting or drilling into insulated walls.