
Introduction: Why Electrical Panel Upgrades Deserve Careful Budgeting
If you’re considering a major home improvement, you might be eyeing visible upgrades like kitchens, bathrooms, or even curb appeal projects. But there’s a less glamorous, absolutely critical upgrade that can affect your home’s safety, resale value, and ability to support modern appliances: the electrical panel. Whether you’re adding central air, an EV charger, or simply want to bring your older home up to code, an electrical panel upgrade is often a prerequisite. Unfortunately, many homeowners underestimate both the complexity and the true cost of this task. From permit fees and surprise rewiring needs to utility coordination and inspection delays, the expenses can add up fast. In this guide, we’ll break down the real costs behind a typical home electrical panel upgrade, spotlight often-overlooked budget items, and give you actionable tips to avoid budget overruns. If you want a smooth, stress-free upgrade, careful planning is essential—read on to learn how to do it right.
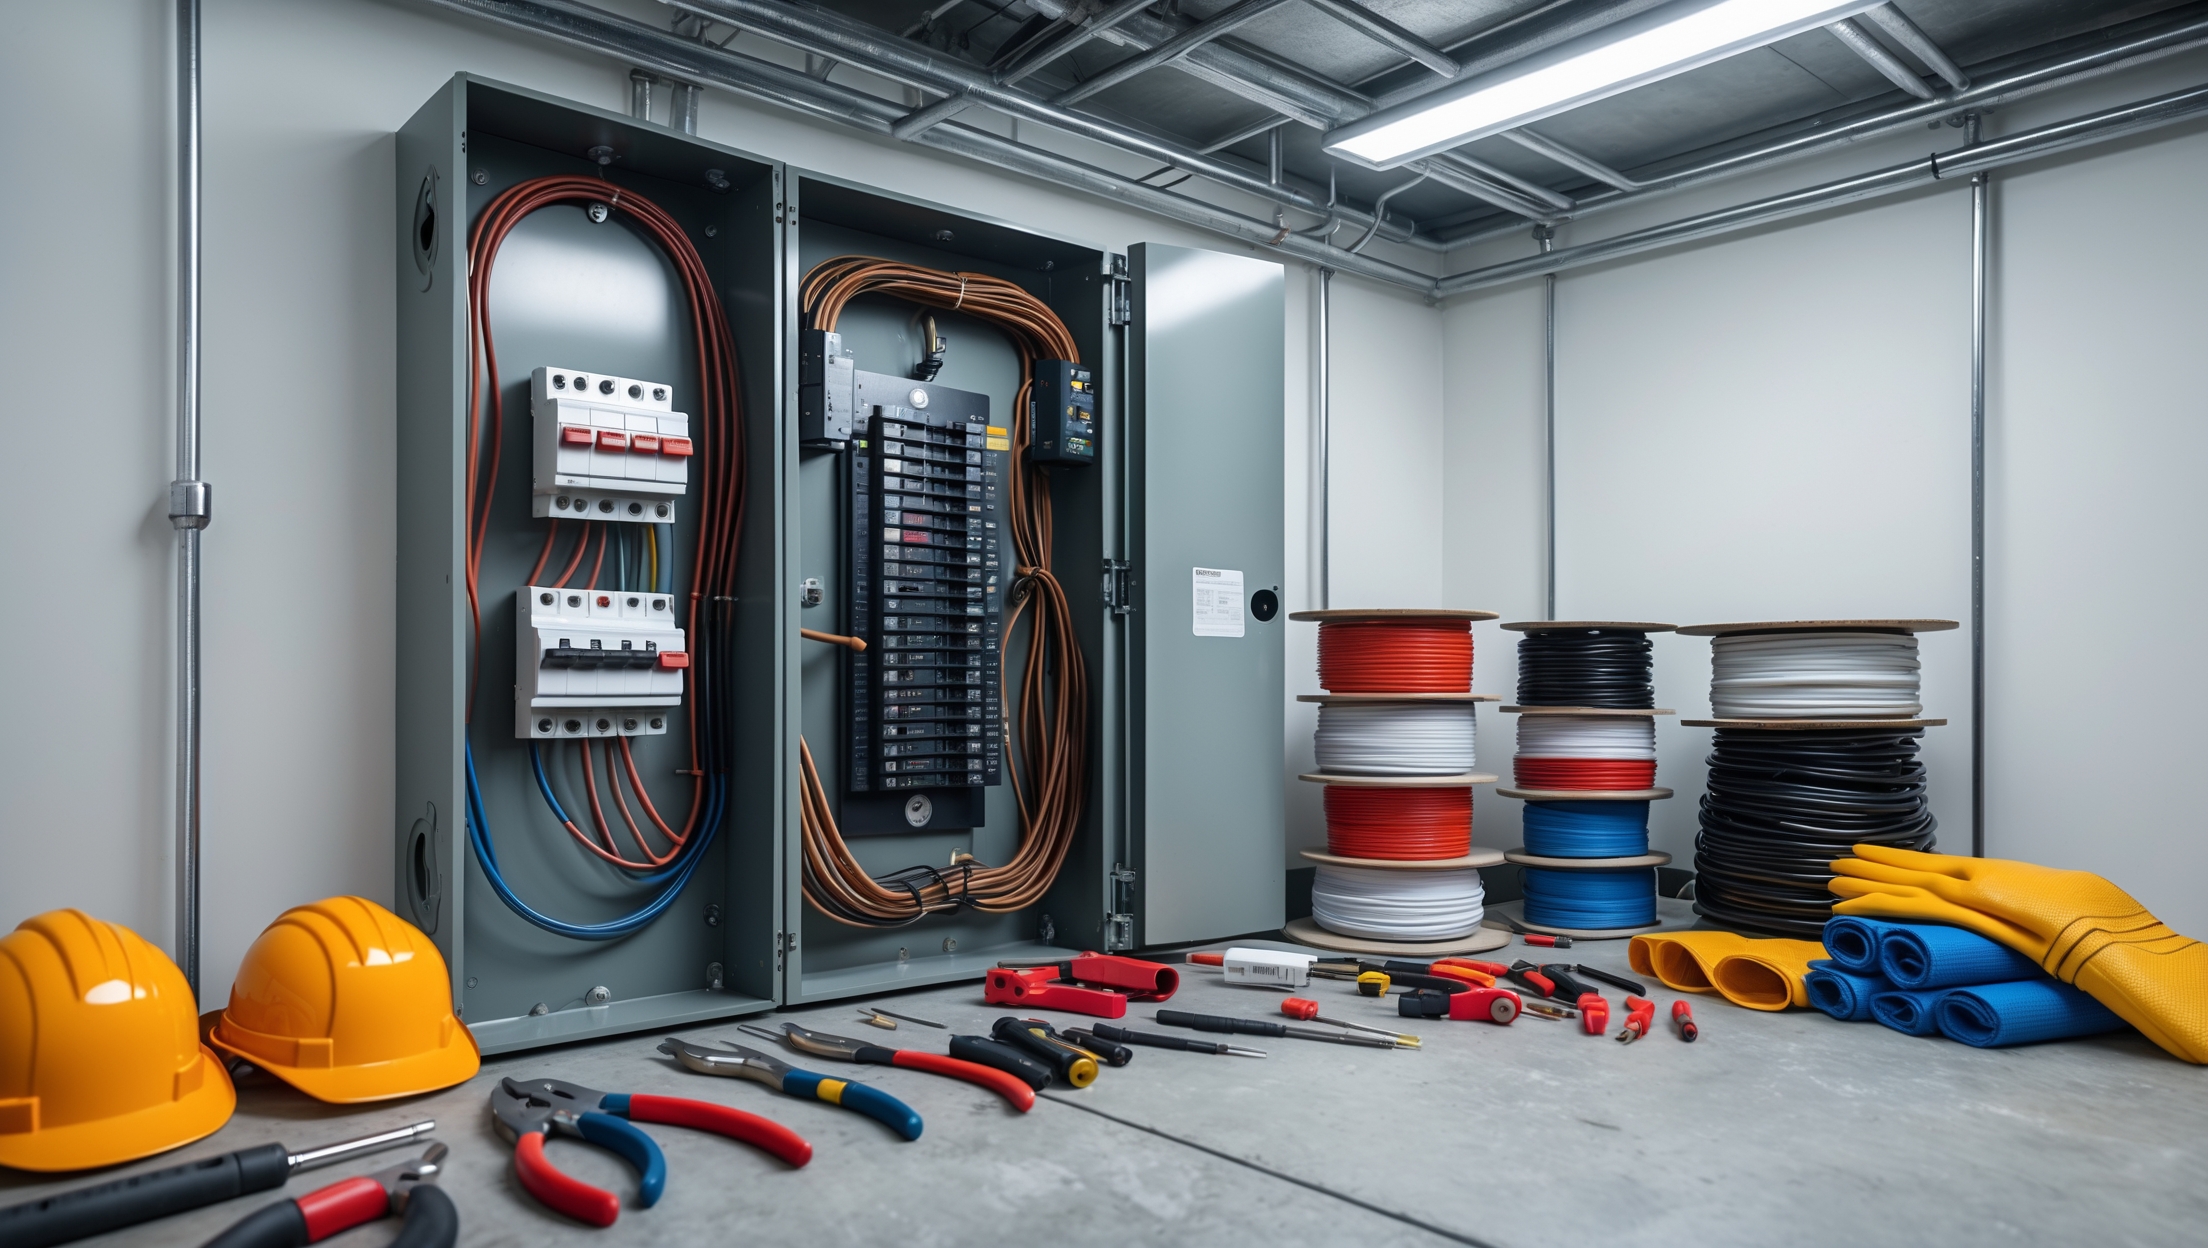
Understanding the Scope: What Is an Electrical Panel Upgrade?
An electrical panel upgrade, also known as a service panel upgrade or panel replacement, involves replacing your home’s main breaker box with a new unit that delivers more power and enhanced safety. In older homes, panels may only provide 60–100 amps of service, which isn’t sufficient for high-demand modern living. Upgrades typically bring homes up to 200 amps, sometimes more, to safely power HVAC systems, kitchen appliances, and home offices.
The process can involve more than just swapping out the panel. It may require:
- New circuit breakers and wiring connections
- Upgrading the meter base or main service cable
- Bringing grounding systems up to current code
- Coordinating with your utility provider for service shutoff and reconnection
- Obtaining permits and passing inspections
Breaking Down the Real Costs: Where Homeowners Get Surprised
1. The Core Panel and Labor
The most visible part of your bill is the panel itself and the electrician’s labor. A new 200-amp panel can cost $150–$450 for the hardware, with labor adding $800–$2,500 depending on complexity. Factors that affect labor costs include accessibility, existing wiring condition, and whether the panel is being relocated.
2. Permitting and Inspection Fees
Every legitimate electrical panel upgrade requires a permit, with fees typically ranging from $50–$350. Multiple inspections may be needed—including rough-in and final approval—especially if rewiring or meter upgrades are involved.
3. Utility Company Coordination
If you’re increasing your home’s service capacity, the utility may need to upgrade the service line or meter. This isn’t always free—some companies charge $500–$2,000, especially if the service drop requires new poles, transformers, or trenching. Even when free, scheduling delays can extend project timelines and add indirect costs if you’re paying for temporary power solutions.
4. Panel Location Challenges
If your existing panel is in a location that’s now considered unsafe or non-compliant (such as a closet or bathroom), you’ll need to relocate it—sometimes adding $1,000–$3,000 to your bill. This can involve drywall repair, rerouting circuits, and possibly upgrading main service cables.
5. Grounding and Bonding Upgrades
Modern electrical codes require robust grounding and bonding, which may not be present in older homes. Installing new ground rods, upgrading water pipe bonds, or adding a ground wire to the main panel can cost $200–$800.
6. Surge Protection and Arc Fault Devices
Many states now require whole-house surge protectors or arc fault circuit interrupters (AFCIs) for safety. These add $100–$600 to the project but are well worth the investment for protecting sensitive electronics and preventing electrical fires.
7. Repairs to Walls, Siding, and Landscaping
Panel upgrades can require cutting into drywall, siding, or even concrete. Some electricians include basic patching, but full restoration—matching paint, refinishing drywall, or replanting shrubs—can add $300–$1,200 or more depending on the extent of disruption.
8. Temporary Power Solutions
Upgrading the panel means your home will be without power for several hours, sometimes a full day. If you require temporary power (especially for home businesses or medical needs), renting a generator or temporary service can cost $50–$300 per day.
9. Unforeseen Code Violations
Once the panel is open, inspectors may spot outdated wiring, missing GFCIs, or other hazards. Correcting these issues is not optional and can add hundreds or even thousands to your final bill.
Budgeting Strategies: How to Avoid Nasty Surprises
Get Multiple Detailed Quotes
Never settle for a single estimate. Ask for itemized quotes that break down labor, materials, permits, and utility coordination. Ask each contractor what is NOT included—some may exclude patching walls or coordinating with the power company.
Ask About Common “Hidden” Upgrades
Before work begins, ask your electrician if your grounding system, meter base, or service cable is likely to need replacement. A reputable contractor will inspect these and warn you of likely costs.
Factor in Inspection and Utility Lead Times
Delays are expensive if you’re living without power or paying for temporary accommodations. Ask contractors how they coordinate inspections and utility shutoffs, and get a realistic schedule in writing.
Build a 15–25% Cushion Into Your Budget
Electrical work often uncovers hidden problems. Plan to spend 15–25% more than your quote to cover surprises. If all goes smoothly, you’ll have money left over—or can upgrade to AFCIs or surge protection.
Don’t Forget Restoration Costs
Clarify with your contractor who is responsible for repairing walls, paint, or landscaping. If they don’t include it, get quotes from handymen or painters so you aren’t caught off guard.
Case Study: Real-World Budget Breakdown
Let’s look at a real-world example of a mid-century home in a suburban neighborhood. The owners wanted to add an EV charger and upgrade the original 100-amp panel to a 200-amp service. Here’s how their costs broke down:
- New 200-amp panel & breakers: $400
- Electrician labor (including removal, installation, and circuit labeling): $1,800
- Permit and inspection: $225
- Utility service upgrade and new meter: $1,200
- Grounding system upgrade (new rods and bonding water pipe): $350
- Drywall repair and repainting: $650
- Whole-house surge protector: $175
- Temporary generator rental: $120
- Contingency for unforeseen issues: $550 (used to correct two outdated circuits and add GFCI protection)
Total cost: $5,470
Their original quote was $4,200, but utility and restoration costs pushed the total higher. Because they budgeted an extra 20%, they weren’t caught off guard and completed the project smoothly.
Frequently Overlooked Savings Opportunities
Bundle Other Electrical Upgrades
If you’re planning on adding circuits for a remodeled kitchen, new lighting, or EV charging, bundle this work with your panel upgrade. This can reduce labor costs and avoid multiple permit fees.
Schedule During Off-Peak Times
Electricians and utility companies are often busiest during spring and summer. Scheduling your upgrade in the fall or winter can sometimes yield lower labor rates and faster utility coordination.
Check for Utility and Local Rebates
Some regions offer rebates or incentives for upgrading to higher-capacity or safer electrical panels—especially if you’re supporting solar panels or EV chargers. Ask your utility and local government about current offers.
Maintain Good Communication With Contractors
Clear, early communication about your expectations and the full scope of work can prevent misunderstandings and change orders that increase costs mid-project.
DIY vs. Professional Hire: Why Panel Upgrades Aren’t a DIY Project
While many homeowners tackle DIY projects, electrical panel upgrades should only be performed by licensed electricians. Aside from the risk of electrocution or fire, most jurisdictions require professional installation for insurance and permitting purposes. Attempting DIY can void your homeowner’s insurance and require costly corrections if you decide to sell your home. Always confirm your contractor’s license and insurance before hiring.
What to Ask Your Electrician Before Signing a Contract
- Is this a fixed price or an estimate? What could cause the price to increase?
- What’s included in terms of restoration (drywall, paint, landscaping)?
- Who coordinates with the utility company for service shutoff and reconnection?
- How will you handle unexpected code violations if they’re discovered mid-project?
- Can you provide recent references for similar panel upgrades?
- Is surge protection or AFCI included? If not, what is the cost to add?
- How long will my home be without power?
- What permits and inspections are required, and who pulls them?
Conclusion: Plan Smart, Upgrade Safely, and Avoid Costly Surprises
Upgrading your home’s electrical panel is much more than a routine hardware swap—it’s a major safety investment that affects every system in your house. The process brings your home in line with modern electrical codes, supports new technologies, and can even impact your homeowner’s insurance rates and resale value. But it’s also one of the most commonly underestimated home improvement projects when it comes to cost and complexity. By understanding the full range of potential expenses, including permits, utility coordination, restoration, and code-driven upgrades, you can avoid common pitfalls that catch homeowners off guard. Remember to get multiple detailed quotes, clarify all restoration and coordination responsibilities, and always leave room in your budget for contingencies. While it may be tempting to save money by cutting corners, electrical work is an area where professional, code-compliant installation is essential for both safety and long-term value. With smart planning and the right team, your electrical panel upgrade can be a smooth, stress-free experience—and a smart investment in your home’s future.
The article mentions that upgrading the grounding system to current code can be one of the hidden costs. How can I tell if my home’s existing grounding needs to be updated during a panel upgrade, and what kind of price range should I expect for that part of the project?
To determine if your home’s grounding system needs updating during a panel upgrade, a licensed electrician will inspect for proper grounding rods, wires, and connections that meet current code. Signs of outdated grounding include missing rods or undersized wiring. Costs vary by home and region, but updating the grounding system typically ranges from $300 to $1,000, depending on what needs to be added or replaced.
If my house is on the older side and might not be up to modern codes, how much should I realistically set aside for hidden costs like rewiring or bringing grounding systems up to date when planning an electrical panel upgrade?
For older homes, it’s wise to budget an extra 30% to 50% on top of the panel upgrade estimate to cover hidden costs like rewiring, updating grounding systems, or addressing outdated wiring. These updates can range from several hundred to a few thousand dollars, depending on your home’s size and what inspectors find during the upgrade process. Getting a detailed quote from a licensed electrician will help you plan more accurately.
I understand from your article that coordinating with the utility provider can affect both costs and scheduling. Can you give some insight into how much time and money this step usually adds, and what I can do to keep any utility-related delays to a minimum?
Coordinating with your utility provider can add anywhere from a few days to several weeks to your project, depending on their workload and permitting processes. Costs may range from no extra charge to a few hundred dollars for disconnect or inspection fees. To minimize delays, contact your utility provider early, ask about required paperwork, and schedule appointments as soon as possible. Staying proactive and maintaining clear communication will help keep things on track.
How long should I expect the whole process to take from scheduling permits to getting power back on, especially if my utility provider is involved in the upgrade?
The entire process for a panel upgrade, including permits and utility involvement, typically takes between one to three weeks. Getting permits can take a few days to over a week, depending on your local authority. The actual panel work and power shutoff usually lasts from several hours to a full day. If your utility provider must disconnect and reconnect service, coordinate with them early, as their scheduling can add extra time.
The article talks about permit fees and hidden rewiring needs adding up quickly. Are there any budgeting strategies or contingency amounts you recommend to make sure homeowners aren’t caught off guard by these unexpected expenses?
To avoid surprises, it’s wise to set aside an extra 15–25% of your upgrade budget for hidden costs like permit fees, rewiring, or unforeseen repairs. Get detailed quotes from electricians and ask specifically about common additional expenses. Also, reach out to your local permit office in advance to estimate fees, and keep a small buffer for unexpected issues that might be uncovered during the upgrade.
If my current electrical panel is only 100 amps but seems to be working fine, how do I determine if upgrading to 200 amps is actually necessary for my home’s appliances and future plans like an EV charger?
To figure out if you need a 200-amp upgrade, add up the electrical demands of your current appliances and any planned additions, like an EV charger or new HVAC system. If the total approaches or exceeds your panel’s 100-amp capacity, an upgrade is likely needed. An electrician can perform a load calculation to give you a clear answer based on your home’s usage and future needs.
If my house still has the original 100 amp panel and I want to upgrade mainly to install an EV charger, do I always need to update grounding systems too, or could that depend on local code requirements? How can I find out what my specific city requires before starting?
Upgrading from a 100 amp panel for an EV charger often means you’ll also need to update your grounding system, but whether this is required depends on your local building codes. To find your city’s specific requirements, contact your local building department or permitting office. You can also ask a licensed electrician familiar with your area—they usually know the latest code updates and permit rules for electrical work.
The article mentions that the upgrade can involve new wiring connections and possibly upgrading the main service cable. Is it possible to estimate those additional wiring costs ahead of time, or do they usually come up as surprises during the process?
Some additional wiring costs can be estimated ahead of time, especially if the electrician can inspect your current setup before work begins. They’ll look for outdated wiring or undersized service cables that need upgrading. However, hidden issues inside walls or unexpected code requirements sometimes only appear during the upgrade process, which can lead to surprise costs. Asking for a detailed inspection and quote upfront helps reduce the chance of unexpected expenses.
If I’m planning to install an EV charger and upgrade the electrical panel at the same time, is there usually a way to combine some of the work or permits to save money? Or do these end up being two totally separate costs?
You can often combine the work for an EV charger installation and an electrical panel upgrade, which may help save on labor and permitting costs. Electricians frequently handle both tasks together, allowing for a single permit and reducing overall project time. Be sure to discuss your plans with your electrician in advance so they can coordinate and bundle the services, which can be more cost-effective than handling them separately.