
Introduction: Shedding Light on Kitchen Upgrades
Under-cabinet lighting can transform an ordinary kitchen into a functional, inviting space. Whether you’re prepping dinner or enjoying late-night snacks, the right lighting adds ambiance, visibility, and even value to your home. However, many homeowners underestimate the complexities involved in installing under-cabinet lighting. From selecting compatible fixtures to ensuring compliance with electrical codes, there are several pitfalls that can turn a simple upgrade into a frustrating—and potentially hazardous—project.
This comprehensive guide is designed to help you avoid the most common mistakes when installing under-cabinet lighting. We’ll break down the essential tools and materials you’ll need, provide a realistic cost and budgeting roadmap, and walk you through key compliance considerations to keep your project both safe and legal. By the end, you’ll have the confidence and knowledge to illuminate your kitchen beautifully—without costly missteps or unnecessary headaches.
Understanding Under-Cabinet Lighting Options
Types of Under-Cabinet Lighting
- LED Strip Lights: Flexible, energy-efficient, and low-profile. Ideal for continuous illumination.
- Puck Lights: Small, circular fixtures that create focused spots of light. Good for accenting specific areas.
- Linear Light Bars: Rigid bars that provide even, bright light. Popular for task lighting.
- Fluorescent Fixtures: Less common today but still found in older installations. Bulky, but cost-effective.
Key Considerations When Choosing Fixtures
- Color Temperature: Warm (2700K–3000K) for cozy vibes; cool (4000K+) for task-oriented spaces.
- Dimmability: Adds versatility. Check compatibility with your dimmer switches.
- Voltage: Low-voltage (12V/24V) for safety, but requires a transformer; line-voltage (120V) for direct wiring.
Budgeting and Cost Breakdown
Typical Costs
- Fixtures: $20–$60 per LED strip or bar; puck kits $30–$70.
- Transformers/Drivers (for low-voltage): $20–$50 each.
- Wiring and Connectors: $10–$30.
- Switches and Dimmers: $15–$40.
- Miscellaneous Hardware (mounting clips, wire nuts, screws): $10–$20.
- Professional Labor (if outsourcing): $250–$600.
Sample Budget for a 10-foot Section
- LED strip light kit: $50
- Transformer: $25
- Wiring and connectors: $20
- Dimmer switch: $30
- Miscellaneous hardware: $15
- Total DIY Cost: ~$140
Always add a 10–15% buffer for unexpected expenses.
Where Homeowners Overspend
- Buying unnecessary accessories: Stick to essentials.
- Overestimating fixture needs: Carefully measure and plan layout first.
- Upgrading to smart controls prematurely: Start simple; you can add smart features later.
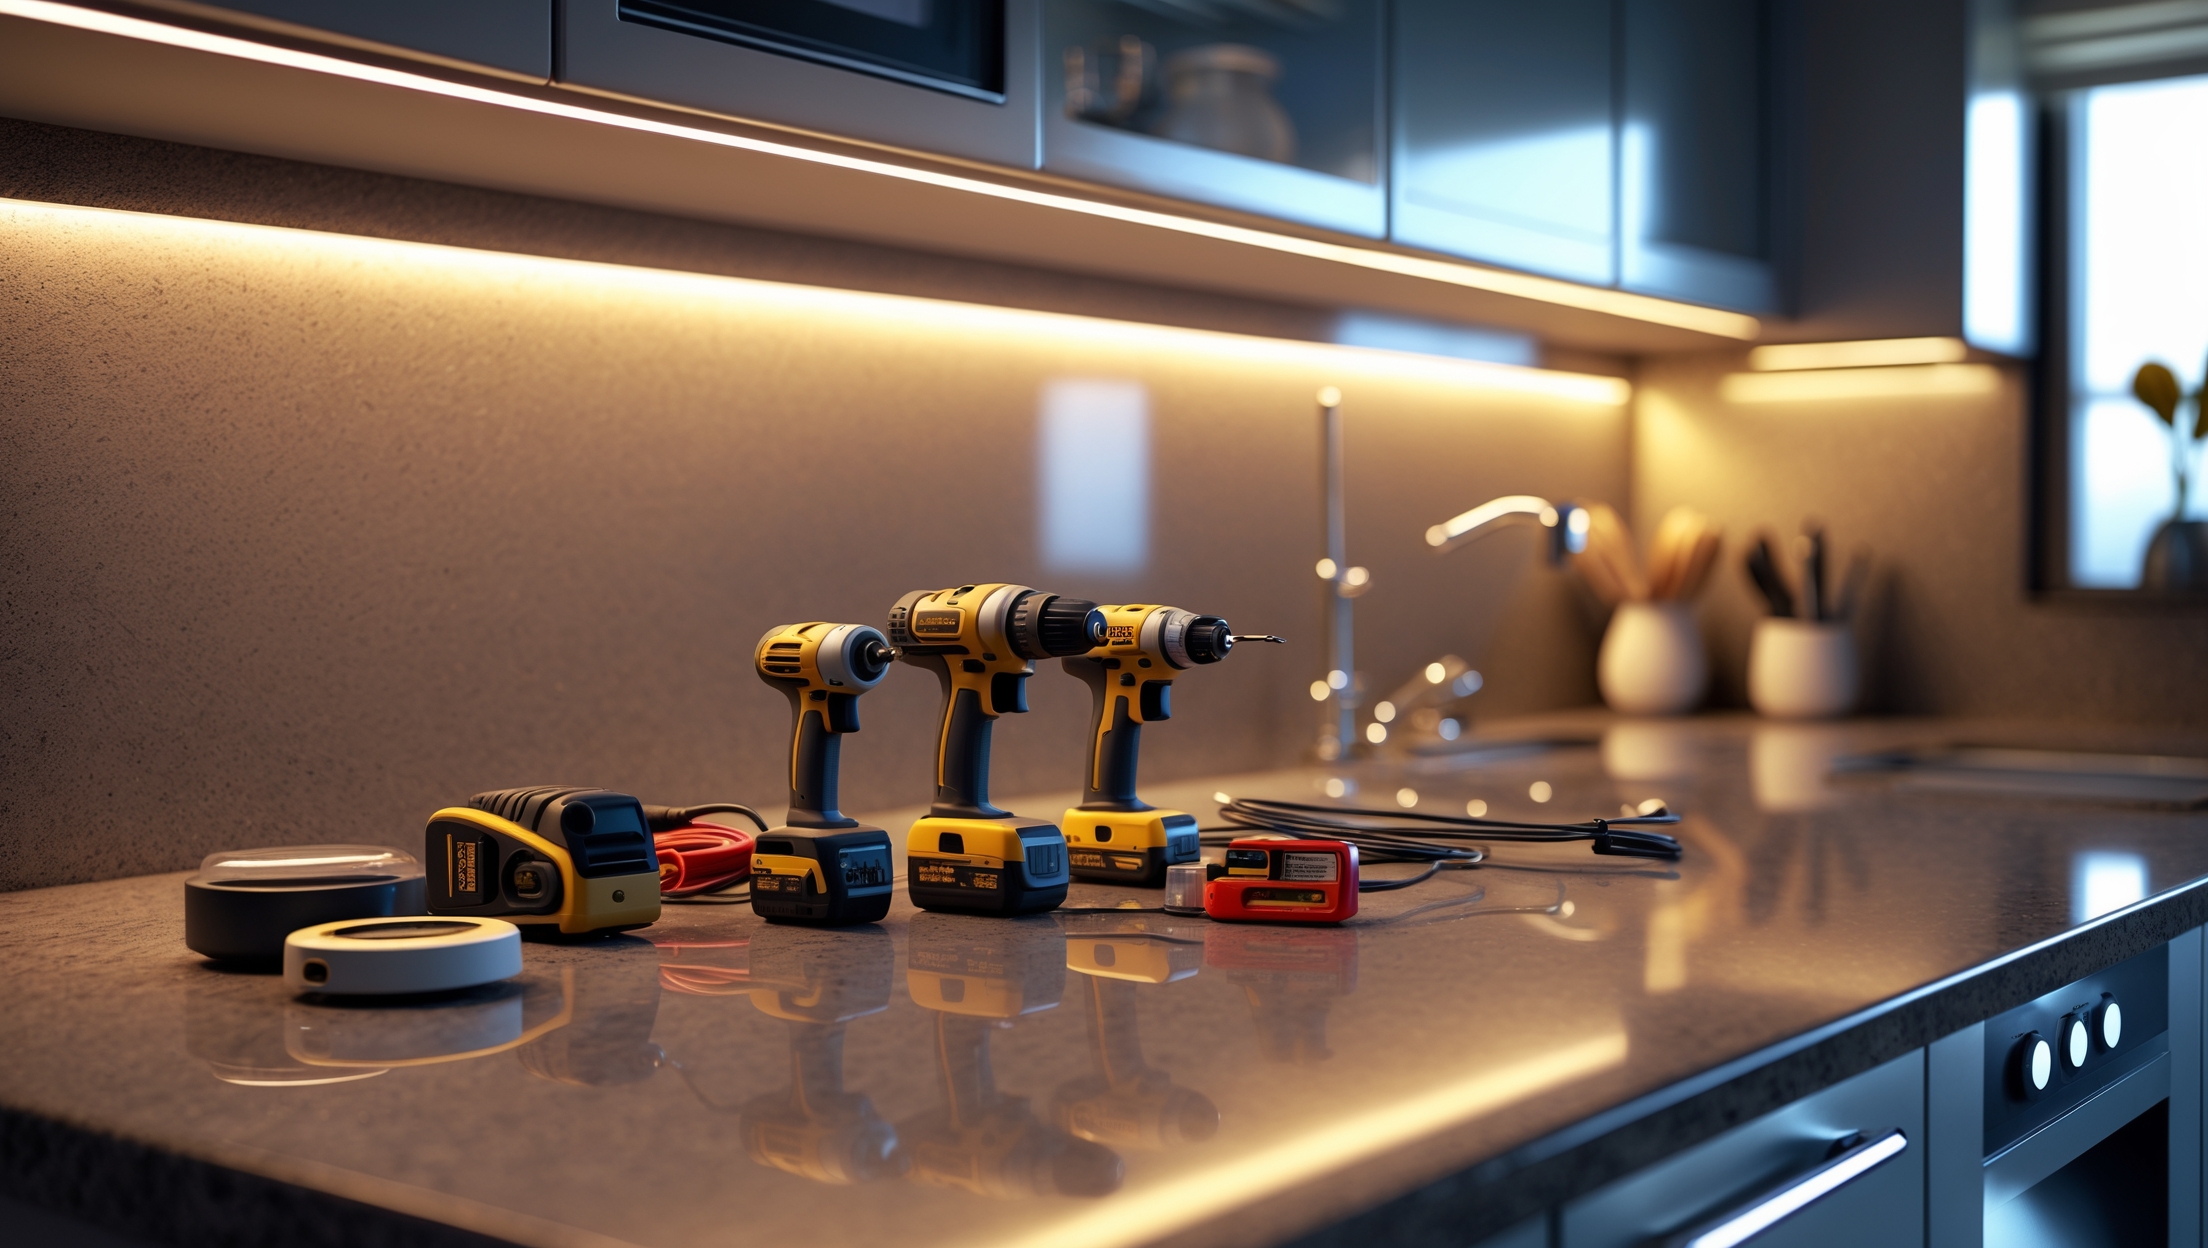
Tools and Equipment: The Essentials for a Seamless Install
- Drill/driver (with assorted bits)
- Wire stripper and cutter
- Voltage tester
- Measuring tape and pencil
- Level (to ensure straight installation)
- Screwdrivers (flat and Phillips head)
- Utility knife
- Double-sided tape (for temporary placement)
- Cable staples or adhesive clips (for wire management)
- Personal protective equipment (safety glasses, gloves)
Optional Tools
- Oscillating multi-tool (for creating wire channels in cabinets)
- Fish tape (for routing wires through walls or tight spaces)
Beginner Mistakes to Avoid
1. Inadequate Planning and Measurement
Rushing into installation without a clear plan is a recipe for wasted time and materials. Carefully measure your cabinet lengths and spacing. Mark fixture locations with a pencil and test-fit each light before mounting. Create a wiring diagram to map out connections, power sources, and switch locations.
2. Using the Wrong Fixtures or Bulbs
Mixing incompatible fixtures—such as connecting line-voltage lights to a low-voltage transformer—can cause flickering, overheating, or total failure. Always check compatibility and voltage requirements. Avoid non-dimmable bulbs if using a dimmer switch.
3. Poor Wire Management
Loose or exposed wires are unsightly and unsafe. Use cable clips, raceways, or adhesive channels to keep wiring tidy and protected. If wires must pass through cabinets, drill clean holes and use grommets to prevent abrasion.
4. Skipping Safety Checks
Never work on live circuits. Always shut off power at the breaker and use a voltage tester to confirm. Use insulated tools and wear safety gear. Overlooking these basics increases the risk of shocks and fire.
5. Ignoring Electrical Code or Permit Requirements
Some municipalities require permits for electrical work, even for low-voltage systems. DIY installations that ignore local codes risk failed inspections, insurance issues, or resale problems. Always check with your local building authority before starting.
6. Overloading Circuits
Adding multiple lights to an already burdened kitchen circuit can trip breakers or cause wiring hazards. Calculate the total wattage and ensure it doesn’t exceed your circuit’s capacity. When in doubt, consult an electrician.
7. Inconsistent Lighting Placement
Unevenly spaced fixtures can result in patchy or shadowy lighting. Layout lights equidistantly and use a level to maintain straight lines. Test light output before finalizing placement.
Step-by-Step Installation Tutorial
Step 1: Create Your Lighting Plan
- Measure cabinet dimensions and mark fixture locations.
- Decide on fixture type and color temperature.
- Determine switch placement and power source.
Step 2: Gather Tools and Materials
- Assemble all fixtures, drivers, wiring, and hardware.
- Have your tools ready and safety gear on hand.
Step 3: Power Off and Prep
- Turn off power at the breaker.
- Use a voltage tester to confirm outlets and switches are dead.
- Remove existing under-cabinet fixtures, if any.
Step 4: Install Fixtures
- Mount light bars, strips, or pucks using screws or adhesive as recommended.
- Ensure fixtures are flush and evenly spaced.
Step 5: Route and Connect Wiring
- Drill holes for wires as needed; use grommets for protection.
- Connect fixtures to power supply or transformer per manufacturer instructions.
- Keep wiring neat with clips or raceways.
Step 6: Install Switches and Dimmers
- Mount new switches or dimmers in convenient locations.
- Wire according to code and instructions.
- Label switches for easy identification.
Step 7: Test and Finalize Installation
- Restore power at the breaker.
- Test each light and switch for proper operation.
- Adjust fixture placement if necessary.
- Clean up workspace and enjoy your new lighting.
Compliance and Permit Considerations
When Is a Permit Required?
Regulations vary, but permits are often needed if:
- You are installing new circuits or modifying existing wiring inside walls.
- Work is being done in a multifamily building or rental property.
- Your municipality requires inspection for all electrical work.
Check with your local building department before starting. Performing unpermitted work can delay future home sales or invalidate insurance claims.
Common Code Requirements
- Use UL-listed fixtures and components.
- Maintain minimum clearances from sinks and water sources.
- All wire splices must be inside accessible junction boxes.
- Use GFCI outlets for kitchen circuits.
- Low-voltage wiring must not be run alongside high-voltage lines.
Document your installation with photos and diagrams to simplify inspections.
Insurance Essentials
DIY electrical work can affect your homeowner’s insurance. Some policies exclude damages from unlicensed or unpermitted work. If you hire a contractor, verify they are licensed and insured. For DIY, keep receipts, photos, and permit documents. If an accident occurs, this documentation can be crucial for claims.
Consider notifying your insurer of the upgrade. Some companies offer discounts for energy-efficient lighting improvements.
Maintenance Best Practices
- Dust fixtures regularly to maintain brightness and prevent overheating.
- Inspect wiring annually for signs of wear or damage.
- Test switches and dimmers periodically.
- Replace bulbs or LEDs with compatible types only.
- If a fixture flickers or fails, troubleshoot promptly—don’t ignore electrical problems.
Conclusion: Illuminate Your Kitchen with Confidence
Adding under-cabinet lighting is one of the most impactful yet approachable kitchen upgrades. But it’s not simply a matter of sticking some lights under a shelf. Successful installation demands careful planning, smart budgeting, and a clear understanding of compliance and safety requirements. By avoiding common mistakes—such as poor measurement, sloppy wiring, and code violations—you ensure your lighting not only looks fantastic but also performs reliably for years.
Remember, the best results come from a methodical approach. Map your layout, invest in the right tools, and never cut corners on safety or code. If you feel uncertain about any step, don’t hesitate to consult a licensed electrician. The peace of mind—and the beautifully illuminated countertops—are well worth the effort.
With your new knowledge, you’re ready to brighten your kitchen the right way. Enjoy the enhanced functionality, improved ambiance, and even energy savings that modern under-cabinet lighting brings. Happy renovating!
When budgeting for under-cabinet lighting, how much of the overall cost usually goes toward electrical compliance or bringing things up to code? I’m wondering if there are some hidden expenses there besides just the fixtures and transformers.
Electrical compliance can add about 10–30% to your total under-cabinet lighting budget, depending on your local codes and the age of your wiring. Beyond the fixtures and transformers, you might need to budget for permits, updated outlets, junction boxes, or a licensed electrician’s time if rewiring or added safety features are required. It’s smart to get an estimate from a professional before starting so you won’t be surprised by hidden costs.
You mentioned the costs for different types of fixtures like LED strips and puck lights, but are there any hidden expenses or extra tools that people often forget to include when budgeting for this kind of project?
People often overlook hidden costs like wire connectors, extension cords, extra mounting hardware, and junction boxes. If your installation requires hardwiring, you might also need a voltage tester or wire strippers. Patch materials for any wall damage and electrical permits (if required) can add to the expense. It’s smart to budget a little extra for these unexpected items.
I see you mention both LED strip lights and linear light bars for under-cabinet lighting. Is there a significant difference in lifespan or maintenance between these two types, or are they about the same once installed?
LED strip lights and linear light bars are both long-lasting options, typically offering lifespans of 20,000 to 50,000 hours. In practice, linear light bars may be slightly more robust due to their solid construction, making them less prone to damage during cleaning or accidental bumps. Maintenance for both is minimal—mainly dusting—but strip lights might require occasional re-adhesion or connection checks over time, especially if installed in high-moisture areas.
Could you provide more detail on how to accurately estimate the total budget, especially when accounting for potential hidden costs like tools or code compliance during installation?
To estimate your total budget accurately, start by listing all known costs: lights, wiring, connectors, and mounting hardware. Next, factor in essential tools you may need to buy or rent, such as a voltage tester, drill, or wire stripper. For code compliance, consider possible permit fees or costs for hiring a licensed electrician if your area requires inspections. It’s wise to add a buffer of 10-20% for unexpected expenses, like extra wiring or replacement parts.
The budgeting section mentions fixture and driver costs, but are there other hidden expenses I should plan for, like special tools or permits, especially if my kitchen’s wiring is old?
Yes, besides fixtures and drivers, you might need to budget for additional items. If your kitchen’s wiring is old, you could need extra wiring, junction boxes, or even an electrician’s help to ensure safety and compliance. Special tools like a voltage tester, wire strippers, or a stud finder may be necessary if you don’t own them. Some areas also require permits for electrical work, so it’s wise to check local codes and factor in possible permit fees.
Could you provide more detail on typical installation costs beyond just the fixtures? I’m trying to plan my budget and wondering about hidden expenses like wiring, connectors, or potential permit fees if I decide to go with line-voltage lighting.
Beyond the cost of the lighting fixtures, you should account for wiring (which can range from $0.50 to $2 per foot), connectors or junction boxes (often $5–$20 each), and mounting hardware. If you’re installing line-voltage lighting, you may need to hire an electrician, which could add $50–$100 per hour in labor. Additionally, some areas require permits for electrical work, with fees typically between $50 and $200. It’s wise to get local quotes to refine your budget.
Could you clarify how to best budget for unexpected costs when installing LED strip lights? For example, are there extra expenses with transformers or wiring that most people overlook when adding up their totals?
When budgeting for LED strip light installation, it’s wise to set aside an additional 10–20% above your initial estimate for unexpected costs. Common overlooked expenses include purchasing the right transformer or power supply, extra connectors or wires, and possibly hiring an electrician if your setup requires new outlets or more complex wiring changes. Always check if your chosen LED strips require special dimmers or mounting channels, as these can add to the total cost.
I’m a little confused about the transformer part you mentioned for low-voltage options. How do I know what size transformer I need, and is it easy to install for someone who hasn’t done much electrical work before?
To choose the right transformer size, total up the wattage of all your under-cabinet lights and select a transformer with a slightly higher wattage rating to handle the load safely. Installation can be straightforward if you follow instructions carefully, but if you haven’t done electrical work before, it’s best to consult a professional or get help to ensure everything is safe and up to code.
The article lists typical costs for fixtures and transformers, but what would you estimate for the total installation by a professional, including labor? I’m trying to budget realistically before I decide to attempt this as a DIY or hire someone.
For a professional installation, the total cost typically ranges from $300 to $700 per 10 linear feet of under-cabinet lighting, depending on fixture type, wiring complexity, and your region. Labor charges make up a significant portion, often $50 to $100 per hour. Getting quotes from local electricians can give you a more accurate estimate tailored to your space and requirements.
I noticed you mention that low-voltage under-cabinet lighting requires a transformer for installation. Can you clarify where the transformer should be placed for both safety and accessibility, and if there are specific code requirements about its location in the kitchen?
The transformer for low-voltage under-cabinet lighting should be installed in a well-ventilated, easily accessible location—often inside a cabinet or in the basement, but not directly above cooking appliances or near water sources. It must remain accessible for maintenance. National Electrical Code (NEC) requires that transformers not be concealed behind walls or in inaccessible spaces. Local codes may be more specific, so it’s always best to confirm with your local building department.
You included a rough cost breakdown for fixtures and drivers, but what about the wiring and other installation supplies? I’m trying to budget for everything upfront and wondering if there are any hidden costs I should plan for when installing LED strip lights in particular.
You’re right, wiring and installation supplies can add to the cost. For LED strip lights, you’ll need to budget for low-voltage wire, connectors, mounting clips or channels, and possibly a dimmer switch. These supplies can range from $20 to $60 depending on your setup. Also, keep in mind costs for a junction box, wire nuts, or adhesive if you want a very clean installation. If you’re not installing it yourself, don’t forget to include potential electrician fees.
You mention the importance of matching dimmer switches to your fixtures. Can you clarify what kind of problems might come up if they’re not compatible? I’m planning to use LED strips with an existing dimmer and want to anticipate potential issues.
If your dimmer switch isn’t compatible with your LED strips, you could face several issues. LEDs might flicker, buzz, or fail to dim smoothly—they may even shut off unexpectedly at lower settings. Incompatibility can also shorten the lifespan of your LEDs or cause the dimmer to overheat. Make sure your dimmer is rated specifically for LEDs, and that its wattage range covers your lighting setup.
Can you clarify what specific electrical code requirements I should be aware of when installing under-cabinet lighting myself, especially if I’m switching from an older fluorescent fixture to LED strips?
When replacing fluorescent fixtures with LED strips, be sure to follow the latest electrical codes. Key points include using UL-listed fixtures, ensuring connections are inside approved junction boxes, and not overloading circuits. All wiring should use appropriate gauge and type (usually 14 or 12 AWG for kitchen circuits), and GFCI protection is often required for kitchen outlets. Double-check that dimmers or switches are rated for LED loads. If in doubt, always consult your local code or a licensed electrician, as local requirements can vary.
When choosing between LED strip lights and puck lights, does one create less visible wiring or is easier to hide the cords? My kitchen doesn’t have existing wiring under the cabinets, so I’m wondering what would look neatest without a lot of extra work.
LED strip lights typically result in less visible wiring and are easier to conceal compared to puck lights. Strips can run seamlessly along the underside of your cabinets, and their slim profile makes it easy to tuck cords out of sight. Puck lights often need individual wires for each light, which can be harder to hide unless your cabinets have a lip or channel for routing them.
I’m curious about the budgeting breakdown for a full kitchen install using LED strip lights versus linear light bars. How much should I expect for labor and materials if I plan to hire a professional?
For a typical kitchen, installing LED strip lights professionally could cost between $300 and $700 for materials and labor, depending on kitchen size and strip light quality. Linear light bars tend to be more expensive, with total costs ranging from $500 to $1,200. Labor often makes up about 40-60% of the total. Getting a detailed quote from an electrician is best, as prices can vary based on layout and electrical work required.
After choosing a fixture style and confirming it’s dimmable, what are the main code compliance steps I should double check before actually wiring the lights? I’m concerned about missing an important detail and would like to avoid any hassle with inspections later.
Before wiring your under-cabinet lights, make sure to use UL-listed fixtures and follow local codes regarding wiring methods—often Romex or armored cable is required, not extension cords. Check that your circuit is properly grounded, use a GFCI-protected outlet if near a sink, and confirm box fill capacity is not exceeded. Secure all wiring inside approved junction boxes and double-check fixture installation instructions for any manufacturer-specific requirements.
When you mention typical fixture costs, are there any hidden expenses I should budget for, like extra wiring, connectors, or permit fees? I want to make sure I’m not caught off guard once I start buying supplies for an LED strip setup.
It’s smart to plan for more than just the cost of LED strips themselves. You may also need additional wiring, connectors, a compatible power supply, mounting hardware, and possibly a dimmer switch. If your installation requires electrical work beyond plugging into an outlet, you might need a permit or electrician, which can add to your costs. Double-check your local regulations to avoid surprises.
For someone who has older fluorescent under-cabinet lights and wants to upgrade to LEDs, is it possible to reuse any existing wiring, or is a complete rewiring usually required to stay compliant with current electrical codes?
You can often reuse existing wiring when upgrading from fluorescent to LED under-cabinet lights, provided the wiring is in good condition and meets current electrical codes. However, some older setups may lack proper grounding or use outdated wiring methods, which could require updates. It’s a good idea to have the wiring inspected, and if needed, make adjustments to ensure everything is safe and code-compliant before installing your new LED lights.
I noticed you talked about color temperatures for different vibes. If my kitchen has both prep and dining areas under cabinets, is it possible or advisable to mix warm and cool color temperatures, or should I stick to one type for consistency?
You can definitely mix warm and cool color temperatures to suit different functions in your kitchen. For example, cool white (4000K–5000K) is great for prep areas since it provides a brighter, more focused light, while warm white (2700K–3000K) creates a cozy atmosphere in dining areas. Just make sure each area has a clear separation, so the different temperatures don’t clash visually.
When figuring out a realistic budget, are there any common hidden costs with under-cabinet lighting installs, like special wiring or extra parts needed for older kitchens? The article talked about budgeting but I’d love examples of what catches most people by surprise.
Homeowners are often surprised by costs like needing additional wiring or upgrading electrical outlets, especially in older kitchens that may not support modern lighting. Sometimes you’ll need junction boxes, low-voltage transformers, or extra connectors. Patchwork or touch-up painting after installation and hiring a licensed electrician for code compliance can also add to the overall expenses. Factoring in these possibilities makes your budget more accurate.
I noticed the article talks about budgeting for both fixtures and transformers. For a mid-sized kitchen, about how much should I realistically set aside for the whole project, including any unexpected costs that might pop up during installation?
For a mid-sized kitchen, you should budget between $300 and $800 for under-cabinet lighting installation. This range covers fixtures, transformers, basic wiring, and standard labor. It’s wise to set aside an extra 10–20% to handle unexpected costs like additional wiring needs or minor repairs uncovered during installation. Adjust your budget if you choose premium fixtures or smart lighting features.
I noticed the article mentions that low-voltage lighting requires a transformer, while line-voltage connects directly. For someone who is new to electrical work, is it safer to stick with low-voltage even though it needs extra equipment, or does the installation complexity pretty much even out anyway?
Low-voltage lighting is generally considered safer for beginners because it carries less electrical risk, but it does involve installing an extra component—the transformer. The wiring is less hazardous, but you still need to follow instructions carefully. Line-voltage setups are more straightforward in terms of equipment but involve working directly with household current, which can be riskier if you’re inexperienced. If safety is your main concern, low-voltage is a good choice, just take your time with the transformer setup.
When it comes to budgeting, are there common unexpected costs to watch out for besides the fixtures and transformers, like professional installation or permits, especially if I want everything to be up to code for my business kitchen?
Absolutely, besides the cost of fixtures and transformers, you should budget for professional installation, especially for a business kitchen where code compliance is strict. Hiring a licensed electrician can be a significant expense. Additionally, you may need permits or inspections, which add to the budget. Unexpected costs can also pop up if your wiring needs upgrades or if existing infrastructure isn’t up to code. Always factor in a buffer for these possible extra expenses.
When it comes to dimmability, how do I figure out if my current dimmer switch will work with LED strips or if I’ll need a specific kind? I’ve heard some combinations can cause flickering or buzzing, and I want to avoid those headaches if possible.
To check if your current dimmer switch is compatible with LED strips, look at both the dimmer and the LED strip packaging or manuals. Standard incandescent dimmers often don’t work well with LEDs and can cause flickering or buzzing. For reliable performance, use an LED-compatible or ‘ELV’ dimmer specifically rated for your LED strip type (such as low-voltage or line-voltage). If in doubt, bring your dimmer model details when buying LED strips, or consult an electrician.
With so many color temperature options mentioned, is it a problem if I mix warm and cool lights under different cabinets, or will that look odd? Is there a best practice for keeping the lighting consistent throughout the kitchen?
Mixing warm and cool lights under different cabinets can create a patchy or uneven look, which many people find distracting. For a cohesive appearance, it’s best to use the same color temperature throughout the kitchen, especially in open areas. Consistency helps the space feel unified and visually comfortable. If you want some variation, consider using different temperatures for specific zones, like warmer light for eating areas and cooler for prep zones, but keep each zone consistent.
The article lists several lighting options like LED strips, puck lights, and linear bars. If my focus is on both task lighting and creating a warm atmosphere in the evenings, is it possible to mix these types in one setup, or would that look odd or create electrical issues?
Mixing different types of under-cabinet lighting, like LED strips for task lighting and puck lights or linear bars for ambiance, is absolutely possible and can be quite effective. It won’t look odd if you plan the layout thoughtfully and use similar color temperatures. There are no electrical issues as long as each fixture is installed per the manufacturer’s instructions and connected safely, ideally on the same circuit.
When it comes to budgeting, are there any hidden expenses beyond the fixtures and transformers that people often overlook, like wiring or permits? Just trying to avoid unpleasant surprises before I start my own install.
Absolutely, there can be a few overlooked expenses besides fixtures and transformers. People often forget about the cost of quality wiring, wire connectors, and mounting hardware. If your project requires new outlets or significant electrical work, you might also need to budget for a permit or an electrician’s services. Patch and paint materials may be needed if you have to cut into walls or cabinets, too. Planning for these extras can help you avoid unexpected costs.
For a small kitchen with only one countertop run, would it be more cost-effective to use puck lights or a single linear light bar, considering both initial price and long-term energy costs?
For a small kitchen with one countertop run, a single linear light bar is usually more cost-effective than multiple puck lights. The initial purchase is often cheaper since you only need one fixture, and installation is simpler. Linear LED bars also tend to be more energy efficient, so you’ll save on long-term electricity costs compared to several puck lights.
You mentioned that linear light bars are popular for task lighting and puck lights work for accents, but is there any issue with mixing these two types in the same run under one set of cabinets? Does it impact wiring or compliance?
Mixing linear light bars and puck lights under the same cabinet run is possible, but it’s important to check that both types are compatible in terms of voltage and dimming capabilities. Connecting different fixtures may complicate wiring, especially if they require separate drivers or power supplies. From a compliance standpoint, always follow manufacturer instructions and local electrical codes to ensure a safe installation. Consider consulting an electrician if you’re unsure about mixing fixture types in one circuit.
Could you clarify what kind of electrical code compliance issues homeowners should double-check before attempting to install line-voltage under-cabinet lights? I want to avoid any trouble with inspectors down the road.
When installing line-voltage under-cabinet lights, be sure to use approved junction boxes, properly rated wiring (usually 12 or 14 gauge for 120V circuits), and GFCI protection where required—especially in kitchens. All splices should be inside electrical boxes, with secure wire connections and proper grounding. Double-check local code requirements on permitting and placement, as some areas have stricter rules. Consulting with your local inspector or a licensed electrician can help ensure full compliance.
When considering LED strip lights versus linear light bars for under-cabinet lighting, are there specific installation or wiring differences that homeowners should be aware of, especially in terms of compatibility with dimmer switches?
Yes, there are some key differences. LED strip lights are often low voltage and may need a compatible dimmable power supply or driver if you want to use dimmer switches. Linear light bars can be either plug-in or hardwired, and not all are dimmable by default. Always check that both the lights and the dimmer switch are compatible, as using mismatched products might cause flickering or damage. Pay special attention to the voltage and type of dimmer recommended by the manufacturer.
The budgeting section mentions fixtures and transformers, but what should I expect to pay for professional installation if I’m not comfortable with DIY? Would electricians typically charge more if my kitchen already has GFCI outlets nearby?
For professional installation, you can generally expect to pay between $200 and $500, depending on your kitchen’s size and the complexity of the job. Having GFCI outlets nearby may actually reduce costs, since electricians can use existing wiring and won’t need to add extra safety features. However, prices can vary by region and the specific electrician, so getting a few quotes is always a good idea.
I noticed the article mentions low-voltage under-cabinet lighting requiring a transformer. Could you clarify whether installing these low-voltage systems typically demands a permit or inspection, especially for a small business kitchen renovation?
For most areas, installing low-voltage under-cabinet lighting may still require a permit and possibly an inspection, especially in a commercial setting like a small business kitchen. Building codes often treat commercial spaces differently than residential ones. It’s important to check with your local building department or permitting office first, as requirements can vary by location and project scope.
Do most US local electrical codes require under-cabinet lighting to be on a separate circuit, or is it usually OK to tap into an existing kitchen outlet? I want to make sure my installation passes inspection.
Most US local electrical codes do not require under-cabinet lighting to be on a completely separate circuit; it’s common to tap into an existing kitchen outlet circuit. However, the circuit must be GFCI-protected and not overloaded. If you’re using hardwired fixtures, some inspectors may prefer a dedicated switch or circuit. Always check with your local building department or inspector, since code interpretation can vary by jurisdiction.
You highlighted the importance of picking the right color temperature, but I’m struggling to decide between warm and cool for my kitchen. Do you have any tips for seeing the difference before buying, or is there a fixture type that lets you easily adjust afterward?
To compare color temperatures before buying, visit a lighting store and view samples in person, or purchase a few bulbs in different temperatures to test at home. Some under-cabinet fixtures offer adjustable color temperature, often called ‘tunable’ or ‘CCT-adjustable’ lights. These let you switch between warm and cool, so you can fine-tune the look after installation.
The article mentions budgeting for transformers or drivers with LED strips, but I’m not sure how to estimate those costs. Do different types of LED strips require different transformers, and is it possible to use a single transformer for multiple strips to save money?
Yes, different LED strips can require different transformers or drivers based on their voltage and wattage. Check the voltage (usually 12V or 24V) and total wattage of all the strips you plan to use. You can often use one transformer if its wattage rating covers the combined load of your strips. For estimating costs, add up the wattage of your strips and look for a transformer with a slightly higher rating. Prices can vary depending on capacity and brand, but planning this way can help you budget accurately.
Is there a noticeable difference in lifespan or energy usage between LED strip lights and linear light bars? I want something bright for food prep, but I’m also hoping to avoid replacing lights often.
LED strip lights and linear light bars are both energy-efficient and long-lasting, but linear light bars often have a slightly longer lifespan due to better heat dissipation. Both options use minimal energy, especially compared to traditional lighting. For bright, reliable kitchen lighting that you won’t need to replace frequently, either is a good choice, but linear light bars may edge out strip lights for longevity in high-use areas like food prep.
I’m torn between installing LED strip lights and linear light bars for my kitchen. Can you clarify which option tends to be simpler for DIY installation while still meeting electrical codes?
LED strip lights are typically simpler for DIY installation compared to linear light bars. They often come with adhesive backing, are flexible to fit various cabinet shapes, and many plug directly into outlets, reducing wiring work. As long as you use UL-listed components and follow the instructions—especially regarding power supply placement and cord management—they can meet electrical codes. Linear light bars might require more drilling and hardwiring, which can be trickier for DIY projects.
The budgeting section lists a wide range for fixture and transformer costs. Are there ways to plan for hidden expenses, like unexpected wiring or additional materials, or would hiring a professional help avoid those surprise costs?
Planning for hidden expenses is definitely wise. When budgeting, consider adding a buffer of 10–20% to cover things like extra wiring, connectors, or mounting hardware you might need unexpectedly. Hiring a professional can help uncover potential issues early, as they can assess your space and point out any challenges you might not anticipate, reducing the chance of surprise costs during installation.
If I want to install low-voltage LED strips but my existing under-cabinet setup is wired for standard 120V, what are the main compliance steps or code requirements I should watch out for to make sure it’s done safely?
To safely install low-voltage LED strips on a 120V wired setup, you’ll need to use a listed transformer to convert 120V to the correct low voltage. Ensure all connections and wiring adhere to the National Electrical Code (NEC), especially regarding proper grounding and enclosure of splices in junction boxes. Also, use appropriately rated wire for low-voltage circuits and never mix low- and high-voltage wiring in the same box unless a divider is used.
When it comes to selecting color temperature, if I want lighting that’s comfortable for both cooking and entertaining, would you recommend sticking with something in the middle range, or is it better to install dimmable lights to adjust as needed?
Choosing a middle-range color temperature, like 3000K to 3500K, usually works well for both cooking and entertaining because it offers a balance between warm and cool light. However, installing dimmable under-cabinet lights gives you even more flexibility, letting you adjust brightness and mood depending on the occasion. If your budget allows, dimmable options are the most versatile.
I’m curious about compliance issues—when choosing between line-voltage and low-voltage options, are there particular building codes or permit requirements that typically catch DIYers off guard during installation?
When installing under-cabinet lighting, DIYers are often surprised by code requirements, especially with line-voltage (120V) systems. These often require permits, inspection, and adherence to specific wiring methods like using conduit or approved boxes. Low-voltage options may be simpler, but the transformer location and wiring still need to meet code. Always check your local codes, as requirements can vary, and consider consulting your permit office to avoid issues.
When it comes to choosing between low-voltage and line-voltage under-cabinet lighting, are there certain situations where one is recommended over the other for US kitchens, especially with regards to safety codes and ease of installation?
Low-voltage under-cabinet lighting is often preferred in US kitchens for safety, especially in areas near water or where wiring flexibility is needed. It usually requires a transformer but is easier for DIY installation and safer for under-cabinet spaces. Line-voltage lighting can be simpler if you already have standard wiring, but it may involve stricter code requirements and should be installed by an electrician. Always check your local electrical codes before deciding.
I noticed the budgeting section touches on fixture and transformer costs for LED setups. Could you provide a more detailed breakdown of potential hidden expenses, like wire connectors or junction boxes, that homeowners often overlook when planning their lighting budget?
Absolutely, beyond fixtures and transformers, homeowners often miss budgeting for items like wire connectors, low-voltage cables, junction boxes, mounting hardware, and cable concealment channels or raceways. You might also need fasteners, electrical tape, and possibly a dimmer switch. If your installation requires a new circuit or outlet, factor in electrical permit fees or the cost of hiring an electrician as well.
You mention both low-voltage and line-voltage options for under-cabinet lighting. For someone tackling a retrofit in an older kitchen, are there important wiring or code compliance issues to watch for when switching from fluorescents to LEDs?
When retrofitting older kitchens, switching from fluorescents to LEDs can raise a few key issues. Low-voltage LEDs may require new transformers or drivers, and you should ensure existing wiring can support the new load. With line-voltage LEDs, check that all wiring and connections meet current electrical codes, especially regarding grounding and box fill limits. If changing from a hardwired fluorescent, an electrical permit or inspection may be required, so it’s best to consult your local code or a licensed electrician.
You mentioned budgeting for transformers or drivers if you choose low-voltage systems. Is it generally more cost-effective to stick with line-voltage fixtures, or do the energy savings from low-voltage setups make up for the higher upfront costs?
Line-voltage fixtures often have lower upfront costs because you don’t need to buy transformers or drivers. However, low-voltage lighting can be more energy-efficient and may last longer, potentially offsetting the initial investment over time. The best choice depends on your usage and how much you value long-term energy savings versus immediate budget concerns.
If my kitchen was remodeled about 15 years ago and still has fluorescent under-cabinet fixtures, is it easy to switch those out for LED strips or bars, or would that likely require an electrician and extra code compliance steps?
Swapping out old fluorescent under-cabinet lights for LED strips or bars is often straightforward, especially if the existing wiring is in good shape. Many LED kits are designed for easy retrofit. However, if your current fixtures are hardwired, or if you’re not comfortable with electrical work, hiring an electrician is safest. Be sure to use LED products that are certified and check if your local codes require updates, especially regarding wiring and connections.
Could you clarify how to choose the right color temperature for kitchens that are used both for cooking and as a gathering space? I’m torn between warm and cool LEDs after reading about their different atmospheres in your guide.
For kitchens serving both as workspaces and gathering spots, consider a neutral white LED in the 3500K to 4000K range. This color temperature provides enough brightness for food prep while still offering a welcoming, comfortable atmosphere for socializing. If your lighting allows, you might also explore tunable LEDs, which let you adjust the color temperature to match different activities and moods.
When budgeting for an under-cabinet lighting project, how much extra should I set aside for unexpected expenses like hiring an electrician or dealing with tricky wiring in an older kitchen? The price range for fixtures is helpful, but I’m trying to get a more complete picture.
When planning your budget, it’s wise to set aside an extra 15–25% of your total project cost for unexpected expenses. In older kitchens, hidden wiring issues or the need to hire a licensed electrician can add a few hundred dollars, depending on complexity. Besides fixtures, factor in costs for permits, professional help, and any drywall repairs. This cushion should help you avoid surprises and keep your project on track.
The cost breakdown lists a wide price range for fixtures and drivers. For a typical 10-foot run of under-cabinet lighting, what’s a ballpark total budget I should set aside if I’m going with LED strips, including any compliance-related purchases?
For a standard 10-foot run using LED strip lights, you should plan for a total budget of about $150 to $300. This covers quality LED strips, a compatible driver, connectors, mounting hardware, and a basic dimmer. If your area requires hardwired installation or permits, add another $50 to $100 for compliance-related materials or inspections. Prices can vary based on brightness, brand, and additional features.
You mentioned budgeting for transformers or drivers with low-voltage setups—how do I figure out the right size or capacity for my kitchen project, and can using an underpowered driver cause issues with LED strip lights?
To determine the right size transformer or driver for your LED strip project, add up the total wattage of all the strips you plan to install and choose a driver with a slightly higher wattage rating (about 20-25% extra) for safety and longevity. Using an underpowered driver can cause flickering, dim lights, or even shorten the life of your LEDs, so always opt for a driver with enough capacity.
You mention that LED strip lights and linear light bars both offer continuous illumination, but is there any difference in terms of long-term maintenance or compatibility with existing dimmer switches? I am trying to decide which would be a better investment for a busy kitchen.
LED strip lights usually require less maintenance, as they have fewer components that can fail and are often easier to replace in sections. However, some strips may not be fully compatible with all existing dimmer switches unless labeled as dimmable and matched with the correct type of dimmer. Linear light bars often work well with standard dimmers but may need bulb replacements over time. For a busy kitchen, consider dimmable LED strips designed for compatibility with your current dimmer for minimal hassle.
The budgeting section mentions fixture prices, but I’m wondering how much to set aside for installation tools and misc supplies beyond the lights themselves. Are there hidden costs that commonly catch DIYers off guard during this type of project?
It’s smart to plan for more than just the light fixtures. Besides the lights, you’ll likely need wire, connectors, a junction box, a quality voltage tester, mounting hardware, and possibly a drill or wire stripper. Depending on your setup, you may also need dimmers or extra switches. Unexpected costs often include additional wiring, replacement drill bits, or trips for missing supplies. Setting aside an extra 15–25% of your lighting budget for tools and miscellaneous materials should help avoid surprises.
I’m trying to decide between LED strip lights and linear light bars for my kitchen remodel. Is there a significant difference in installation complexity or ongoing maintenance costs between the two, especially when it comes to compliance with electrical codes?
LED strip lights are generally easier to install, often requiring just adhesive backing or simple clips, while linear light bars might need brackets and more secure mounting. For maintenance, strip lights may need replacing as a whole if sections go out, while linear bars often allow for replacing individual units. Both options can meet electrical codes if they are rated for your application and installed with proper wiring and power supplies, but hardwired light bars may require more attention to compliance.
Does installing under-cabinet lighting generally require a permit, or are there cases where it’s considered a minor upgrade that doesn’t need one? I want to make sure I’m following code but also not overcomplicating things if I do it myself.
Whether you need a permit for under-cabinet lighting depends on your local building codes and how extensive the electrical work is. In many places, simple plug-in or battery-powered lights are considered minor upgrades and don’t require a permit. However, if you plan to hardwire lighting into your home’s electrical system, a permit is often needed to ensure safety and code compliance. It’s a good idea to check with your local permitting office before starting, just to be sure.
You cover color temperature and dimmability, but I’m stuck deciding between puck lights and LED strips for a work-heavy kitchen. Is one generally better for reducing shadows when chopping and cooking, or do they work well together if installed properly?
For a work-heavy kitchen, LED strips usually provide more even, shadow-free lighting because they offer a continuous line of light beneath the cabinets. Puck lights can create pools of light with more noticeable shadows between them. However, combining both can work well—use strips for general illumination and pucks to highlight specific spots. Just make sure to space everything evenly for the best effect.
You listed fixture costs and mentioned budgeting, but how should I account for unexpected expenses like extra connectors or drilling bits? As a first-timer, I’m worried about my project going over budget because of things I might overlook.
When budgeting for under-cabinet lighting, it’s smart to set aside an extra 10–20% above your estimated costs to cover unexpected items such as extra connectors, drill bits, or fasteners. Make a list of all possible tools and small accessories you might need, even if you’re unsure you’ll use them. If possible, check return policies so you can return unused items. This buffer helps you avoid stress if something unplanned comes up during installation.
Your budgeting section lists fixture and transformer costs, but I wondered if there are any hidden expenses to budget for, such as special connectors, permits, or new outlets when installing LED strip lights under cabinets.
You’re right to consider hidden costs. When installing LED strip lights under cabinets, you might need extra items like connectors, mounting clips, or specialized wiring. If your installation requires new outlets or hardwiring, hiring an electrician can add to the expense. In some areas, electrical permits may also be necessary, so it’s wise to check local codes and factor these possible costs into your budget.
When it comes to choosing between low-voltage and line-voltage under-cabinet lights, how do I determine which is better for a DIY installation in terms of both safety and ease? Would the transformer for low-voltage add a lot to the complexity or budget?
Choosing between low-voltage and line-voltage under-cabinet lights mainly depends on your comfort with electrical work and your specific needs. Low-voltage lights are often safer for DIY installation because they operate at lower voltages, reducing shock risk, but they do require a transformer. This adds a bit to both the cost and complexity, as you’ll need to find a suitable place for the transformer and handle extra wiring. Line-voltage systems are simpler to install if you’re replacing existing fixtures, but they require careful attention to electrical codes. For most beginners, low-voltage systems are generally safer, though slightly more involved.
You touched on the differences between low-voltage and line-voltage options. If my kitchen already has outlets under the cabinets, is it usually simpler or safer to go with plug-in LED bars rather than trying to hardwire or install a transformer?
If your kitchen already has outlets under the cabinets, using plug-in LED bars is usually simpler and safer than hardwiring or installing a transformer. Plug-in options avoid electrical work, reduce installation time, and make future upgrades easier. Just make sure cords are neatly managed and that the outlets are positioned conveniently for the lights you choose.
When budgeting for an under-cabinet lighting project, does the total estimated cost typically include wiring and professional labor, or are those separate expenses homeowners should plan for beyond the price of fixtures and transformers?
The total estimated cost for under-cabinet lighting can vary depending on how quotes are presented. Often, the price of fixtures and transformers is listed separately from wiring and professional labor. Homeowners should confirm with suppliers or installers whether wiring and labor are included or if those are additional expenses. It’s always wise to ask for a detailed, itemized estimate to avoid surprises.
I noticed you highlighted the importance of checking dimmer compatibility with under-cabinet LED strips. In practice, have you run into any issues with dimmable LEDs flickering or buzzing, and are there any specific brands or features I should look for to avoid that problem?
Flickering and buzzing with dimmable LED strips can happen if the dimmer and LEDs aren’t properly matched. It’s best to use LED-compatible or specifically labeled ‘ELV’ or ‘trailing edge’ dimmers, as these generally work better with LEDs. Brands like Lutron and Leviton are known for their reliable dimmers. Also, check that your LED strips are marked as dimmable and see if the manufacturer recommends certain dimmers—that usually helps avoid compatibility problems.
For someone budgeting carefully, are there any hidden costs besides the $20–$60 per LED strip or the puck kit prices—like wiring, connectors, or code-required upgrades? Trying to avoid unexpected expenses that might pop up during installation.
Yes, there can be extra costs beyond the price of the LED strips or puck kits. You might need to buy wiring, connectors, mounting hardware, or specialized dimmer switches, depending on your setup. If your current outlets or circuits aren’t up to code, an electrician may be needed for upgrades, which can add to the total expense. Double-check what’s included with your lighting kit and plan for these potential add-ons.
You mentioned color temperature and dimmability as important factors, but I’m not sure how easy it is to change dimmers or bulbs later on. If I choose the wrong type initially, can I swap them out easily down the line, or is that a major hassle?
Swapping out bulbs for a different color temperature is usually straightforward if your fixtures use standard bulbs. However, if your under-cabinet lights are integrated LEDs, changing the color temperature later may require replacing the entire fixture. For dimmers, if your new lights are compatible with common dimmer switches, swapping dimmers is manageable, but always double-check compatibility to avoid flickering or issues.
If I want warm lighting for ambiance but also need good visibility for cooking tasks, is there a way to combine color temperatures, or would dimmable fixtures be enough to balance both needs?
You can achieve both ambiance and task lighting by combining color temperatures—installing fixtures with adjustable (tunable) color temperatures or using separate warm and cool lights. Dimmable fixtures alone mainly control brightness, not color tone. For flexibility, look for under-cabinet lights that allow you to switch between warm and cool white, or consider layering dimmable warm and cool fixtures together.
You mention code compliance being important, but I’m not sure what to look for when buying fixtures. Are there certain certifications or labels I should be checking for to make sure my under-cabinet lighting is up to code?
When shopping for under-cabinet lighting, look for fixtures that are UL (Underwriters Laboratories) or ETL (Electrical Testing Laboratories) listed—these certifications indicate the product meets recognized safety standards. Also, check your local building codes, as some areas require specific ratings, like damp location approval, especially in kitchens. Checking for these labels will help ensure your installation is code compliant and safe.
Could you clarify how the budgeting usually accounts for extra materials like connectors and mounting hardware? The fixture and transformer costs are mentioned, but I want to make sure I’m not overlooking any hidden expenses for a typical under-cabinet lighting install.
Budgeting for under-cabinet lighting should absolutely include connectors, mounting hardware, wire, and sometimes junction boxes, as these are often sold separately from the main fixture and transformer. It’s wise to list all components you’ll need, check if they’re included with your fixtures, and add about 10-15% to your budget for any extra clips, screws, or extension cables you might require during installation.
If I want to mix both LED strip lights and puck lights in my kitchen for different areas, is there a good way to wire them together or would they need separate circuits and transformers?
You can usually wire both LED strip lights and puck lights together, as long as they operate at the same voltage and are compatible with the same type of transformer or power supply. Just make sure the total wattage doesn’t exceed the transformer’s capacity. If they require different voltages or types of drivers, you’ll need separate transformers and possibly separate circuits for safety and performance.
You mentioned budgeting for transformers or drivers for low-voltage LED strips. Are there any hidden or recurring costs with these setups—like replacement parts or increased energy bills—that homeowners usually overlook when planning their project?
Homeowners sometimes overlook a few ongoing costs with low-voltage LED setups. Besides the initial purchase of transformers or drivers, you might need to replace them every few years if they fail. Also, while LEDs are energy-efficient, leaving under-cabinet lights on for long hours can still increase your electricity bill. Additionally, certain dimmer switches or compatible controls might be needed, adding to costs. Regular maintenance is minimal, but it’s worth factoring in these possibilities.
The guide talks about color temperature and dimmability when choosing fixtures. If I want lighting that’s good for both cooking and creating a cozy atmosphere, is there a type or setup that’s best for flexibility, or would I need to compromise on something?
You don’t have to compromise—you can get both functionality and ambiance by choosing under-cabinet lighting with adjustable color temperature (often called tunable white) and built-in dimming features. This way, you can set bright, cool light for cooking and switch to a warmer, dimmed glow for a cozy feel. Look for fixtures or LED strips that specifically mention both dimmability and color temperature adjustment.
I’m a little confused about the voltage options you mention. If I want to go with a safer low-voltage setup for my under-cabinet lights, does that make installation more complicated because of the transformer? Is it something a beginner can handle or should I call an electrician?
Choosing low-voltage lighting is indeed safer, as it reduces electrical shock risk. However, it does require a transformer, which adds an extra step to the installation. Many beginners can handle low-voltage setups by carefully following instructions, but you’ll need to mount the transformer and ensure correct wiring. If you’re not comfortable working with electrical connections or local codes, it’s wise to consult or hire an electrician for safety and compliance.
I’m considering both linear light bars and puck lights for my kitchen, but I’m not sure how their installation differs in terms of required tools or complexity. Could you elaborate on whether one option is generally easier to install for a DIYer?
Linear light bars are usually easier for DIY installation because they mount in a straight line and often come with simple clips or screws. You typically need a drill, screwdriver, and possibly a measuring tape. Puck lights, on the other hand, require more precise placement and additional wiring if you want them evenly spaced, which can increase complexity and the number of holes to drill. For most DIYers, linear light bars tend to be the more straightforward and forgiving option.
You listed the cost range for LED strips, bars, and puck kits, but does that usually cover everything needed for installation, or are there hidden expenses like connectors or wiring I should budget for separately?
The cost ranges mentioned for LED strips, bars, and puck kits typically cover the main lighting components, but there are often extra expenses to consider. You may need to budget separately for connectors, additional wiring, mounting hardware, and possibly a compatible dimmer or power adapter. Double-check what’s included in your kit and plan for these add-ons to avoid surprises.
I’m interested in the budgeting part you mentioned. Does the $20–$60 per LED strip include things like the transformer and installation materials, or is that just for the lights themselves? I want to make sure I’m planning for all the hidden costs.
The $20–$60 per LED strip mentioned in the article typically covers just the LED strips themselves. You should budget extra for a transformer (also called a power supply), connectors, mounting channels, and any tools or fasteners needed. If you’re hiring someone for installation, labor costs will be additional as well. Factoring in these items will help you avoid unexpected expenses.
The budgeting section lists a range for fixtures and transformers, but does that include costs for hiring an electrician, or is that just for DIY installation? I’m trying to plan for the total expense.
The budgeting section’s cost estimates are specifically for the materials—fixtures, transformers, and related supplies—assuming a DIY installation. Professional electrician fees are not included in those numbers. If you’re hiring an electrician, you’ll want to add labor costs, which can vary based on your location and the complexity of the job.
The budgeting section touched on fixture and transformer costs, but could you expand on what additional expenses might come up unexpectedly during an under-cabinet lighting installation, such as tools, permits, or professional labor, especially for older kitchens?
In addition to fixtures and transformers, other unexpected costs may include purchasing extra wiring, connectors, or mounting hardware. If your kitchen is older, you might need to update electrical outlets or address outdated wiring, which can add to expenses. Permits may be required depending on your local codes, and hiring a licensed electrician for safe installation is often advisable—this labor cost can be significant. Also, specialized tools like wire strippers or voltage testers might be needed if you don’t already own them.
You outlined fixture costs but I’m curious how much I should budget for potential compliance-related expenses, like hiring an electrician or getting permits. Are those typically significant compared to the cost of the lighting itself?
Compliance-related expenses can sometimes be as significant as the lighting fixtures themselves, especially if local codes require permits or a licensed electrician. Electrician fees and permits can add several hundred dollars to your budget, depending on your location and project complexity. It’s a good idea to check local regulations and get estimates from electricians to understand the full scope of compliance costs before starting.
Can you provide more detail on how to accurately estimate the total cost when budgeting for under-cabinet lighting, especially if the kitchen has unusual cabinet lengths or corners that might impact the number of fixtures or transformers needed?
To accurately estimate your total cost, start by measuring each cabinet section, including any corners or irregular lengths. Plan your fixture layout to ensure even lighting and check if corners require extra connectors or specialized fixtures. Calculate the number of lights and transformers based on the total wattage needed. Don’t forget to include costs for wiring, connectors, installation hardware, and possible electrician fees. It helps to sketch your kitchen and list out each item needed for a precise budget.
When deciding between low-voltage and line-voltage under-cabinet lighting, are there any important electrical code considerations besides needing a transformer for low-voltage? I want to be sure I handle compliance properly if I plan to do the installation myself.
Yes, there are several electrical code considerations beyond just using a transformer for low-voltage lighting. For both types, you’ll need to use approved junction boxes for any connections, and all wiring must be properly rated and protected—no open splices or exposed wires. Low-voltage wiring often has more flexible installation rules, but you still need to follow guidance on wire gauge, overcurrent protection, and accessible transformers. Make sure all fixtures are listed for their intended use and that you follow your local code, as some areas require permits or inspections even for low-voltage installations.
If my kitchen already has older fluorescent under-cabinet lights, is it easy to swap those out for LED bars or strips? Are there any common mistakes or extra compliance issues to watch out for during that kind of upgrade?
Upgrading from fluorescent to LED under-cabinet lighting is possible, but there are a few things to keep in mind. Many LED bars or strips are designed for direct replacement, but you may need to remove ballasts and possibly rewire the fixtures. Check that your new LEDs are compatible with your existing wiring and meet local electrical codes. Avoid common mistakes like leaving old ballasts in place or overloading circuits, and always turn off the power before starting work.
After choosing between LED strips and puck lights, what’s the best way to plan out the exact placement and spacing to avoid dark spots or uneven lighting under the cabinets? Are there any common layout mistakes I should watch out for?
To achieve even lighting, start by measuring your cabinet length and planning to place lights toward the front edge rather than at the back. For LED strips, run them in a continuous line without breaks. For puck lights, space them evenly—about 8 to 12 inches apart—making sure each spot overlaps slightly with the next. A common mistake is spacing lights too far apart or placing them behind objects, causing shadows. Always test placement temporarily before final installation.
When deciding between LED strip lights and linear light bars for under-cabinet installations, are there specific situations where one is clearly better than the other in terms of lifespan or maintenance needs?
LED strip lights usually have a similar lifespan to linear light bars, but maintenance can differ. Strip lights can be harder to replace if installed with adhesive, and they are more vulnerable to damage from moisture or cleaning. Linear light bars are often easier to wipe clean and swap out, making them a better choice in kitchens with high humidity or where frequent cleaning is needed.
I’m curious about compliance—are there any specific electrical codes or permits I should be aware of if my business kitchen is in a commercial space, versus a residential one? The article mentions code compliance but doesn’t go into detail for businesses.
For commercial kitchens, electrical codes are typically stricter than in residential settings. You’ll need to follow the National Electrical Code (NEC), but local jurisdictions may have additional requirements. Permits are almost always required for commercial work, and installation must be done by a licensed electrician. It’s important to check with your local building department to confirm specific rules and permit needs for your area.
Could you give more guidance on how to accurately estimate the total cost before starting? For example, are there hidden expenses besides the fixtures and drivers, like wiring or outlets, that people often overlook?
Absolutely, it’s easy to miss some costs when planning under-cabinet lighting. In addition to fixtures and drivers, don’t forget about wiring, connectors, switches or dimmers, mounting materials, and possibly new or upgraded outlets. Some installs also need junction boxes or electrical boxes if new wiring is required. If hiring an electrician, factor in labor and any needed permits. Making a detailed list of all components and checking your kitchen layout for special needs will help you create a more accurate budget.
The cost breakdown lists both fixtures and transformers, but I’m a little confused about when I actually need a transformer or driver. Can you explain how to know if my chosen LED strips will require one, or is that something you usually find out when buying the kit?
Whether you need a transformer or driver for your LED strips depends on the type of LED you choose. Most LED strips operate on low voltage (like 12V or 24V DC), so they require a transformer or driver to convert your home’s standard voltage. If the LED strip packaging or product details specify ‘plug-and-play’ or ‘direct to mains,’ you likely don’t need a separate transformer. Otherwise, you’ll need one, and this is usually mentioned in the kit details or product specifications.
I noticed you mentioned both low-voltage and line-voltage options for under-cabinet lighting. If my kitchen already has some pre-existing electrical outlets under the cabinets, would it be easier or safer to stick to low-voltage lights, or is converting to line-voltage still recommended?
If you already have outlets under your cabinets, low-voltage lighting is often easier and safer to install since it typically just requires plugging in a transformer and running the low-voltage wiring. Line-voltage lights may offer more power, but installing them could require extra wiring or code compliance steps. Unless you need the specific benefits of line-voltage, low-voltage is usually more DIY-friendly in your situation.
I noticed the article mentions transformers and drivers needed for low-voltage under-cabinet lights. How do I figure out the right size or specs for these transformers, and are there safety or code issues to watch out for if I try to DIY the electrical part?
To choose the right transformer or driver, you’ll need to match the wattage and voltage of your under-cabinet lights. Add up the wattage of all the fixtures and select a transformer that can handle at least that total, ideally with a small margin. Double-check if your lights require 12V or 24V. For safety and code compliance, electrical work often must follow local building codes and may require a permit or licensed electrician, especially if hardwiring. Always disconnect power before installation and ensure proper connections to avoid fire risks.
I’m a bit unclear on transformers for low-voltage setups—do those need to be concealed inside cabinets, or can they be placed elsewhere? Are there any code or safety concerns with transformer placement during installation?
Transformers for low-voltage under-cabinet lighting can often be placed inside cabinets, in adjacent cabinets, or even in accessible areas like basements or utility rooms, depending on your layout. The key is making sure they are accessible for maintenance, not exposed to moisture, and properly ventilated. Always follow local electrical codes—many require transformers not be concealed behind walls or in inaccessible places for safety reasons. When in doubt, check the manufacturer’s guidelines and consult your local building code.
Could you clarify whether most under-cabinet LED strip light kits come with compatible transformers, or is it typically necessary to budget separately for those components when planning costs?
Most under-cabinet LED strip light kits do include a compatible transformer or power supply, but it’s not universal. Some kits are sold as strips only, especially if they’re intended for custom installations, so it’s important to check the product details before purchasing. When budgeting, always verify what’s included in the kit and plan separately for a transformer if it’s not listed.
I saw the budgeting section mentions the costs for LED strips and puck lights, but how much should I expect to spend in total if I also need to hire an electrician for wiring and code compliance? Is that usually necessary for most homeowners?
If your installation involves new wiring or connecting to existing electrical circuits, hiring an electrician is usually necessary for safety and code compliance. For most homeowners, this is recommended. Total costs can vary, but you might expect to spend $250–$600 or more for professional installation, on top of the $30–$150 for lighting materials. Always check local codes and consider getting a few quotes from licensed electricians.
The article mentions that low-voltage options like 12V or 24V lighting require a transformer. How much space should I plan for the transformer under my cabinets, and are there any common issues with hiding or venting these components during installation?
When planning for a transformer, set aside a space of about 6 to 12 inches in length and 2 to 3 inches in height, though sizes vary by model. Place the transformer in a spot with adequate airflow and avoid sealing it tightly, as overheating is a common issue. Try to position it in a cabinet corner or above toe kicks, keeping it accessible for maintenance.
I noticed the article mentions transformers for low-voltage under-cabinet lighting. Can you clarify how to properly size a transformer for a small kitchen setup? I want to be sure I don’t buy something too weak or unnecessarily expensive.
To size a transformer correctly, first add up the total wattage of all the low-voltage lights you plan to install under your cabinets. Choose a transformer with a wattage rating at least 20% higher than this total to allow for safe, efficient operation and any future additions. For example, if your lights total 40 watts, look for a transformer rated at 50 watts or more. This ensures you won’t overload it or overspend on an unnecessarily large unit.
You mentioned compliance with electrical codes—if I’m planning to DIY the installation, what’s the best way to make sure I’m following local regulations? Is it worth getting a permit, or should I have an electrician check my work afterward?
To ensure you’re following local electrical codes, it’s important to check with your city or county permitting office—they can tell you if a permit is needed for your project. Getting a permit is often required for electrical work and helps ensure safety. Even if you DIY, having your installation inspected by a qualified electrician or the local inspector can provide peace of mind and confirm that everything meets code.
Between LED strip lights and linear light bars, which would be less complicated for a small business owner to install without prior electrical experience? Do either option have common compliance issues to watch out for during installation?
LED strip lights are generally less complicated for beginners to install than linear light bars. They often come with adhesive backing and plug-and-play kits, minimizing wiring. However, both options can face compliance issues if not installed to local electrical codes, especially regarding power supply safety and secure mounting. Make sure to use UL-listed products and avoid overloading circuits to stay compliant.
For someone running a business out of their home, are there specific electrical code requirements or inspection steps I should be aware of when installing under-cabinet lights, especially if I want to keep everything legal and up to code?
If you’re running a business from home, it’s especially important to follow your local electrical code. Typically, hardwired under-cabinet lighting installations may require a permit and inspection, especially for business use. All wiring should be done by a licensed electrician, and products should be UL-listed. Check with your local building department about permit requirements and any specific codes related to commercial activity within a residence to ensure full compliance.
I noticed the article touches on compliance considerations. How do I make sure my new under-cabinet lights meet local electrical codes, especially if I’m installing them myself without hiring an electrician?
To ensure your under-cabinet lights comply with local electrical codes, start by checking your city’s building or permitting office for specific requirements. Use UL-listed fixtures and follow the manufacturer’s instructions carefully. If hardwiring is involved, use the correct gauge wire, install a junction box if needed, and make sure all connections are secure. If you’re unsure, some localities allow consultations or inspections for DIY work to help you stay compliant.
When comparing low-voltage and line-voltage under-cabinet lighting, are there any important safety or code compliance factors I should be especially aware of if I’m installing these myself in an older home?
When installing under-cabinet lighting in an older home, note that low-voltage systems usually require a transformer and may have fewer code restrictions, but all wiring must still be up to code. Line-voltage systems (like standard 120V) involve more direct connection to household wiring and must meet strict electrical codes, including proper junction boxes and possibly GFCI protection. Always turn off power at the breaker and consult local code requirements, as older homes can have outdated or non-standard wiring.
Is it possible to mix different types of under-cabinet lighting, like using LED strips in some areas and puck lights in others, or would that complicate compliance with electrical codes?
Mixing different types of under-cabinet lighting, like LED strips and puck lights, is absolutely possible and often done for both function and aesthetics. Just make sure that all fixtures are rated for the same voltage, and that wiring and connections comply with local electrical codes. Using compatible, UL-listed components and following manufacturer instructions will help keep your installation both safe and code-compliant.
I’m interested in installing LED strip lights, but the article mentioned compliance with electrical codes. Are there specific code requirements I should be aware of if I want my under-cabinet lights to be on a dimmer switch?
When installing LED strip lights on a dimmer switch, you’ll want to ensure the dimmer is compatible with both LEDs and the transformer or driver you use. Electrical codes often require all under-cabinet lighting circuits and connections to be UL-listed, securely mounted, and not overloaded. If wiring is hardwired, connections must be made in accessible junction boxes, and you should follow local codes on GFCI protection, especially in kitchens. Always turn off power before working and consider having a licensed electrician inspect your setup for compliance.
You talk about the differences between LED strips, puck lights, and linear bars. If I want something both dimmable and bright for meal prep, but also energy efficient, which type would be the best fit for a busy family kitchen?
For a busy family kitchen where you need both brightness and dimming options, LED strips are usually the best fit. They offer high brightness, are very energy efficient, and many models can be easily dimmed. They also provide even light distribution across your counter. Just make sure to choose a high-quality, dimmable LED strip designed for kitchen use.
The budgeting section lists a range for fixtures and transformers, but does that include installation costs if you need to hire an electrician, or should I plan for additional expenses beyond what was mentioned?
The budgeting section in the article covers the costs for fixtures and transformers themselves, but it does not include professional installation fees. If you plan to hire an electrician, you should budget for their labor separately. Installation costs can vary depending on the complexity of your setup, so getting a couple of quotes beforehand is a good idea.
The budgeting section gives fixture price ranges, but are there any hidden costs I should anticipate, like additional wiring, connectors, or permitting fees, that could make the project more expensive than expected?
Yes, beyond the fixture prices, you might run into extra costs like electrical wiring, connectors, mounting hardware, and even specialized tools if you don’t already own them. If the installation involves new electrical work or changes to existing wiring, a permit may be required, which can add to the cost. Also, hiring a professional electrician, if needed, will increase your overall expenses.
In your budgeting section, you mentioned fixture prices and transformers, but how much should I realistically set aside for unexpected expenses like extra wiring or dealing with tricky cabinet layouts? Are there other hidden costs I should plan for up front?
It’s wise to add about 15–20% to your initial budget for unexpected expenses. Extra costs can come from needing longer wiring, additional connectors, or specialized mounting hardware if your cabinet layout is complex. You might also face small expenses for patching holes or touch-up paint. If you’re hiring an electrician, set aside some budget for extra labor in case installation takes longer than expected.
The guide lists LED strips, puck lights, and linear bars. How do I know which one is best for areas where I do a lot of food prep versus places where we just want some softer accent light? Are some easier to install than others?
For food prep areas, LED strips or linear bars are ideal because they provide bright, even light across countertops, making it easier to see while you work. For softer accent lighting, puck lights are a good choice since they create pools of gentle light. In terms of installation, LED strips are usually the easiest to put up, followed by linear bars, while puck lights may take a bit more measuring and placement.
For an older kitchen that still has some fluorescent under-cabinet lights, is it feasible to swap those out for LED bars or strips, or will rewiring usually be required? I’m curious if it’s mostly a simple retrofit or if I should expect more complexity.
Swapping fluorescent under-cabinet lights for LED bars or strips is often feasible, but the process can vary. If your existing fixtures are plug-in types, you may be able to find LED replacements that use the same wiring. However, if they are hardwired, some rewiring is usually required to remove the ballast and connect the LEDs directly to power. Check your fixture type and be prepared for minor electrical work, especially with older setups.
I noticed you mentioned budgeting for transformers or drivers with low-voltage lighting systems. Do you have any tips on estimating those extra costs upfront so I’m not caught off guard during installation?
To estimate the costs for transformers or drivers, first check the wattage and voltage requirements of all your planned lights. Add up the total wattage, then choose a transformer or driver rated slightly higher than your total. Research prices for suitable units, factoring in whether you need multiple transformers for separate zones. Remember to include possible expenses for wiring and connectors in your calculations.
I’m interested in using a dimmer with my under-cabinet lights, but I’m not sure how to make sure everything is compatible. Are there certain features or brands I should look for to avoid issues with flickering or buzzing?
To prevent flickering or buzzing with a dimmer, make sure your under-cabinet lights and dimmer switch are compatible. For LED lights, choose an LED-compatible dimmer and check that both the dimmer and lights list the same dimming technology (like trailing edge or leading edge). Some brands, like Lutron and Leviton, are known for reliable dimmers. Always double-check compatibility on the packaging or manufacturer’s website before buying.
I noticed you said fluorescent fixtures are less common now compared to LED options. If I already have old fluorescent lights installed, is it easy to swap them out for LED bars, or would I need to redo a lot of electrical connections?
You can typically swap out fluorescent fixtures for LED bars without a complete overhaul, but some updates are usually needed. Many LED bars are designed to fit in place of old fluorescent fixtures, but you may need to bypass or remove the fluorescent ballast and possibly adjust wiring. It’s a manageable project for anyone comfortable with basic electrical work, but if you’re unsure, consulting an electrician is always safest.
Could you clarify how to determine if my existing dimmer switches are compatible with new under-cabinet LED fixtures? I want to avoid buying lights I can’t actually dim.
To check if your dimmer switches will work with new under-cabinet LED fixtures, first identify the make and model of your current dimmer. Next, look for compatibility information from both the dimmer and the LED fixture manufacturers. Most standard dimmers are designed for incandescent bulbs and may not work properly with LEDs. Look for terms like ‘LED-compatible’ or ‘ELV/MLV dimmer’ in the product specs. If you’re unsure, it’s a good idea to bring your dimmer details when shopping for LED fixtures or consult an electrician.
The article lists several lighting types, but how do I know whether LED strips or puck lights are better for uneven cabinet spacing? Is one type easier to install in older kitchens with odd dimensions?
LED strip lights are usually a better choice for uneven cabinet spacing because they provide a continuous line of illumination, helping to avoid dark spots between cabinets of varying widths. They are also flexible and can be cut to fit, which makes installation easier in kitchens with unusual or older layouts. Puck lights can work, but they may leave gaps in lighting if your cabinet spacing is inconsistent.
You mention compliance with electrical codes—are there specific permit requirements or inspection steps homeowners need to consider before or after installing under-cabinet lighting in the kitchen?
Yes, permit requirements often depend on your local building codes. Many areas require a permit for new electrical work, including under-cabinet lighting, especially if wiring is involved. After installation, an inspection might also be needed to verify safety and code compliance. It’s best to check with your city or county’s building department before you start to be sure you’re following the correct steps.
The budgeting section mentions typical costs for fixtures and transformers, but does that include installation materials like wires, clips, and connectors, or should I be budgeting extra for those as well? Trying to get a more accurate total cost before I start.
The costs listed for fixtures and transformers usually cover just those core components, not installation materials like wires, clips, or connectors. You should definitely budget extra for those items. Depending on your setup and the length of lighting runs, these materials can add a noticeable amount to your total. It’s smart to estimate quantities and check prices beforehand to avoid surprises.
When budgeting for under-cabinet lights, do hidden costs often come up after the initial purchase, like extra wiring or code compliance fees? I want to avoid surprises, so any advice on planning for the full project cost would help.
Hidden costs can definitely arise with under-cabinet lighting projects. Beyond the initial purchase, you might need extra wiring, connectors, or mounting hardware, and sometimes older homes require electrical upgrades to meet code. If you’re hiring an electrician, factor in their labor rates and possible permit fees. To avoid surprises, make a detailed list of all parts needed, check with your local building department about requirements, and get a few installation quotes if you’re not doing it yourself.